# WMS Process (warehouse)
Prerequisite
Log in with the admin account
# Step 1: Add a merchant and generate a merchant login account for the merchant
# 1-1: System Management-Merchant (New Merchant)
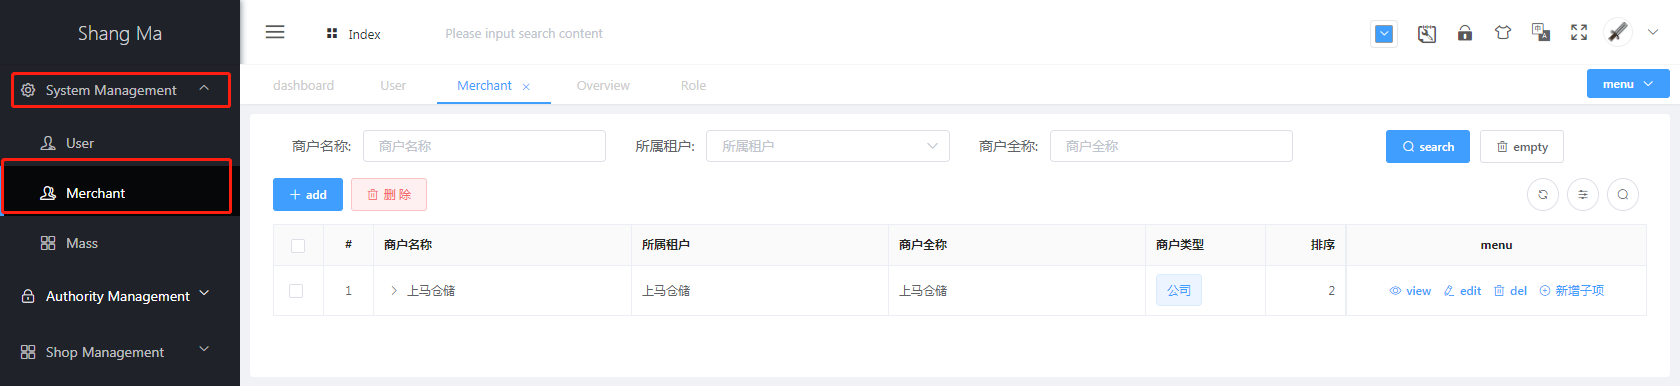
Select
System Management, selectMerchant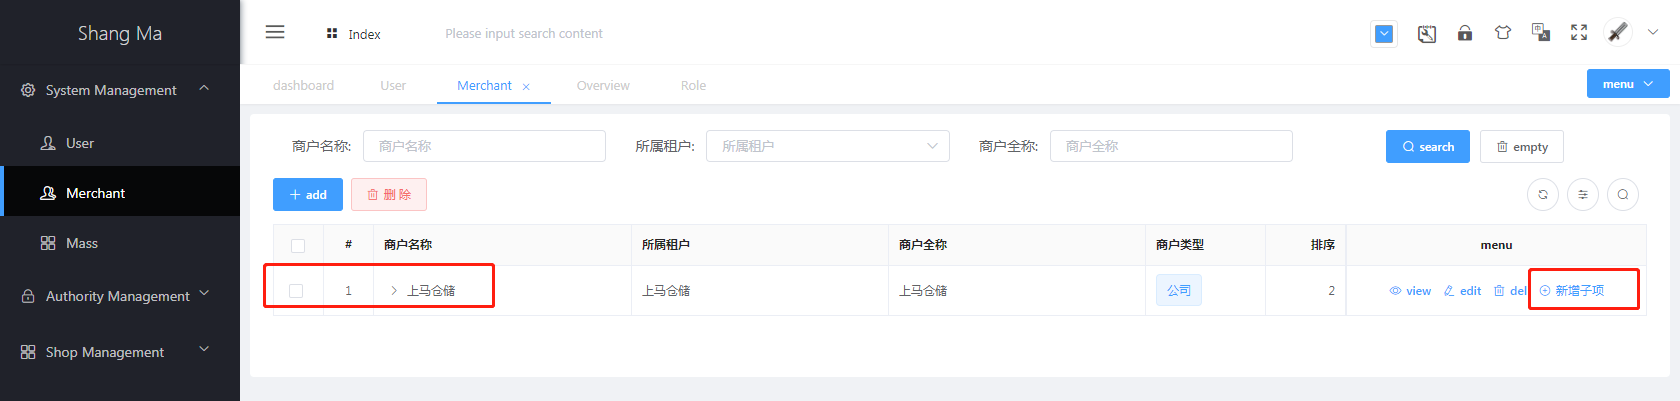
Select the merchant bank you belong to and click
Add Child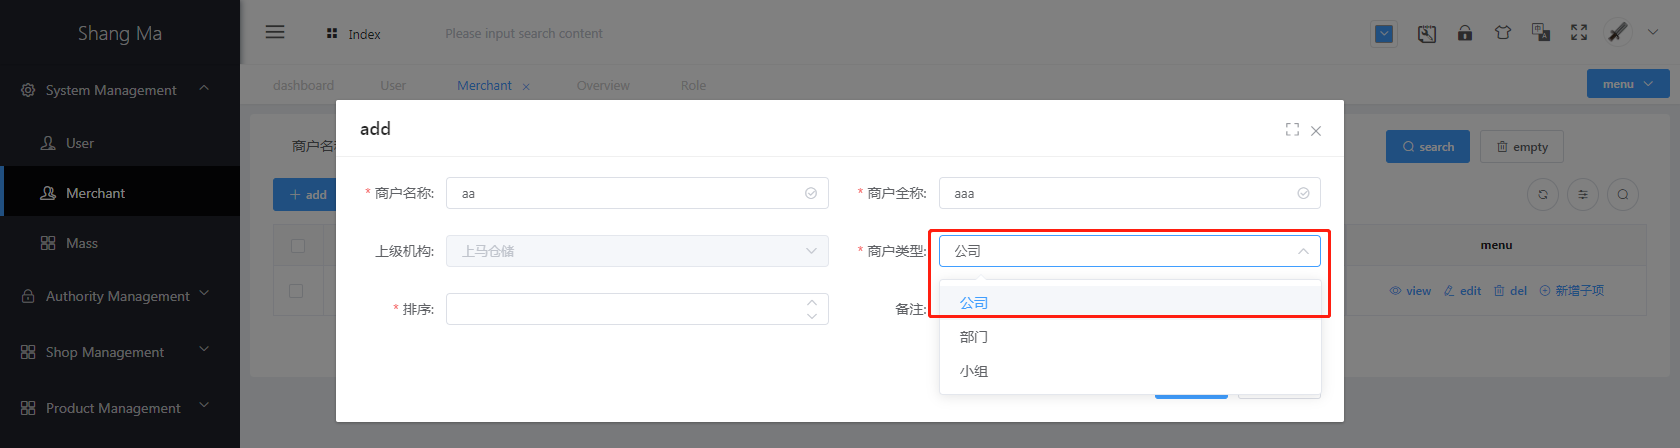
Fill in the relevant information
- The parent organization will be automatically associated, no need to fill in
- Merchant type, select
Company - Sort, fill in the number (as a sorted display of the merchants on this page)
Click the
Savebutton, the page will display the newly added merchant list after successful addition
# 1-2: System Management-User (Add login account)
Select
System Management, selectUser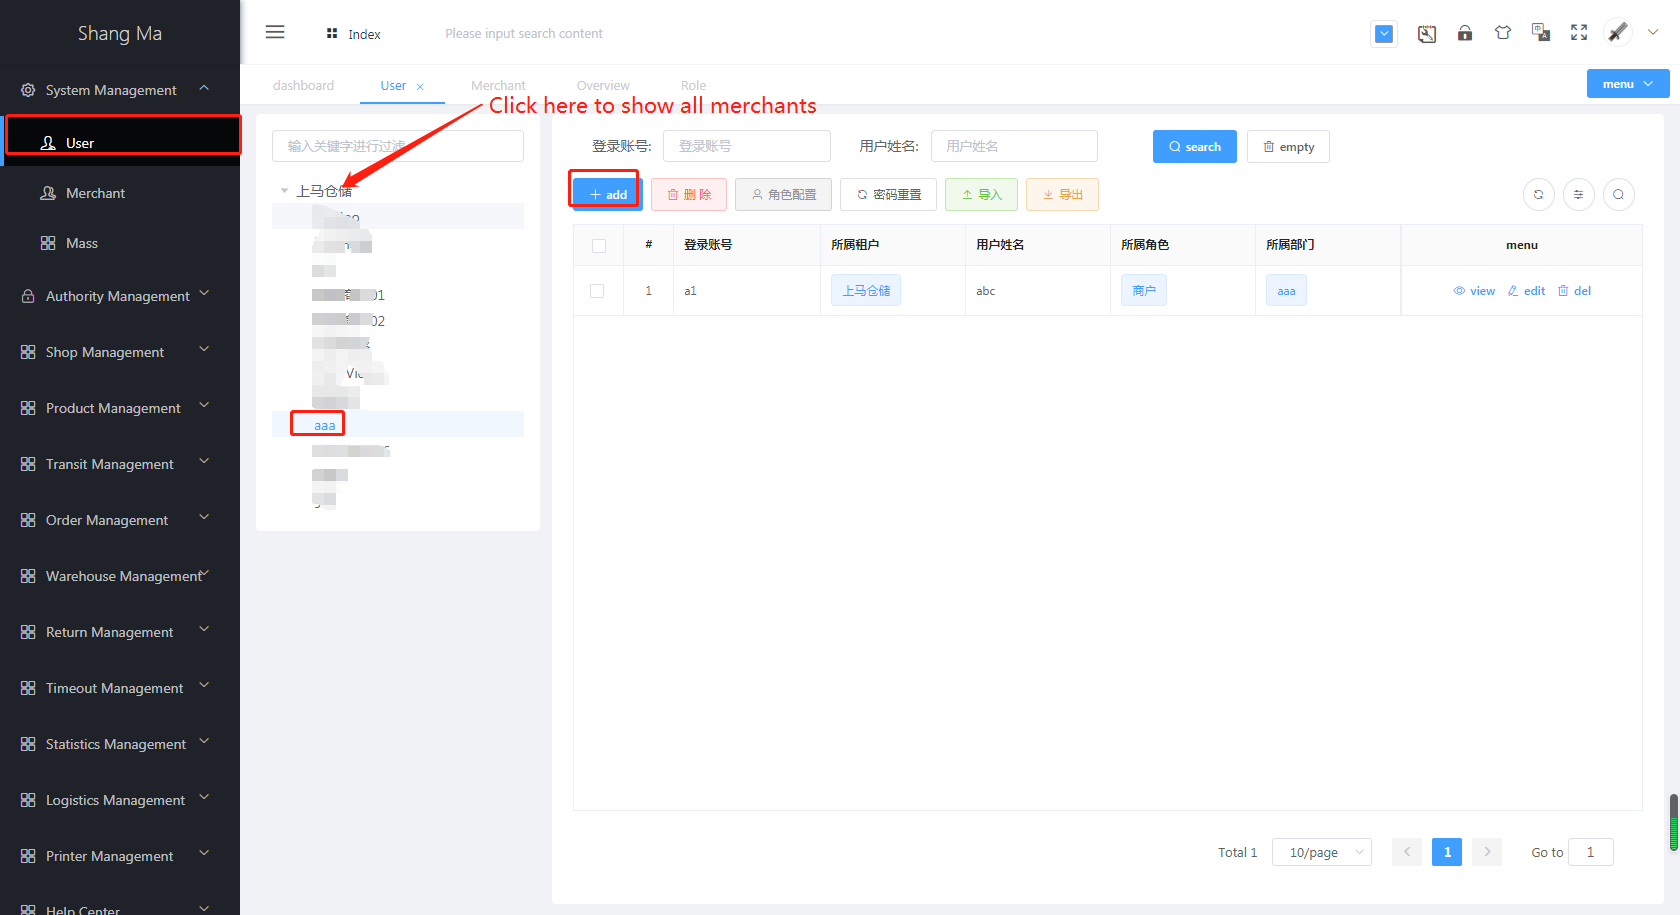
Click the business you want to add, and then click the
Addbutton in the right areaNew user (basic information)
Add user (details)
New user (professional information)
- User ID (associated with the prefix of the merchant’s product code eg: 108-)
- The user number here needs special attention, the value filled in is corresponding to the prefix of the platform commodity code
- If the product SKU has no prefix, you can leave it blank
- Belonging to the role, select
merchant(corresponding to the name of the merchant can be) - Department, select the newly added
merchant - Position, select
CEO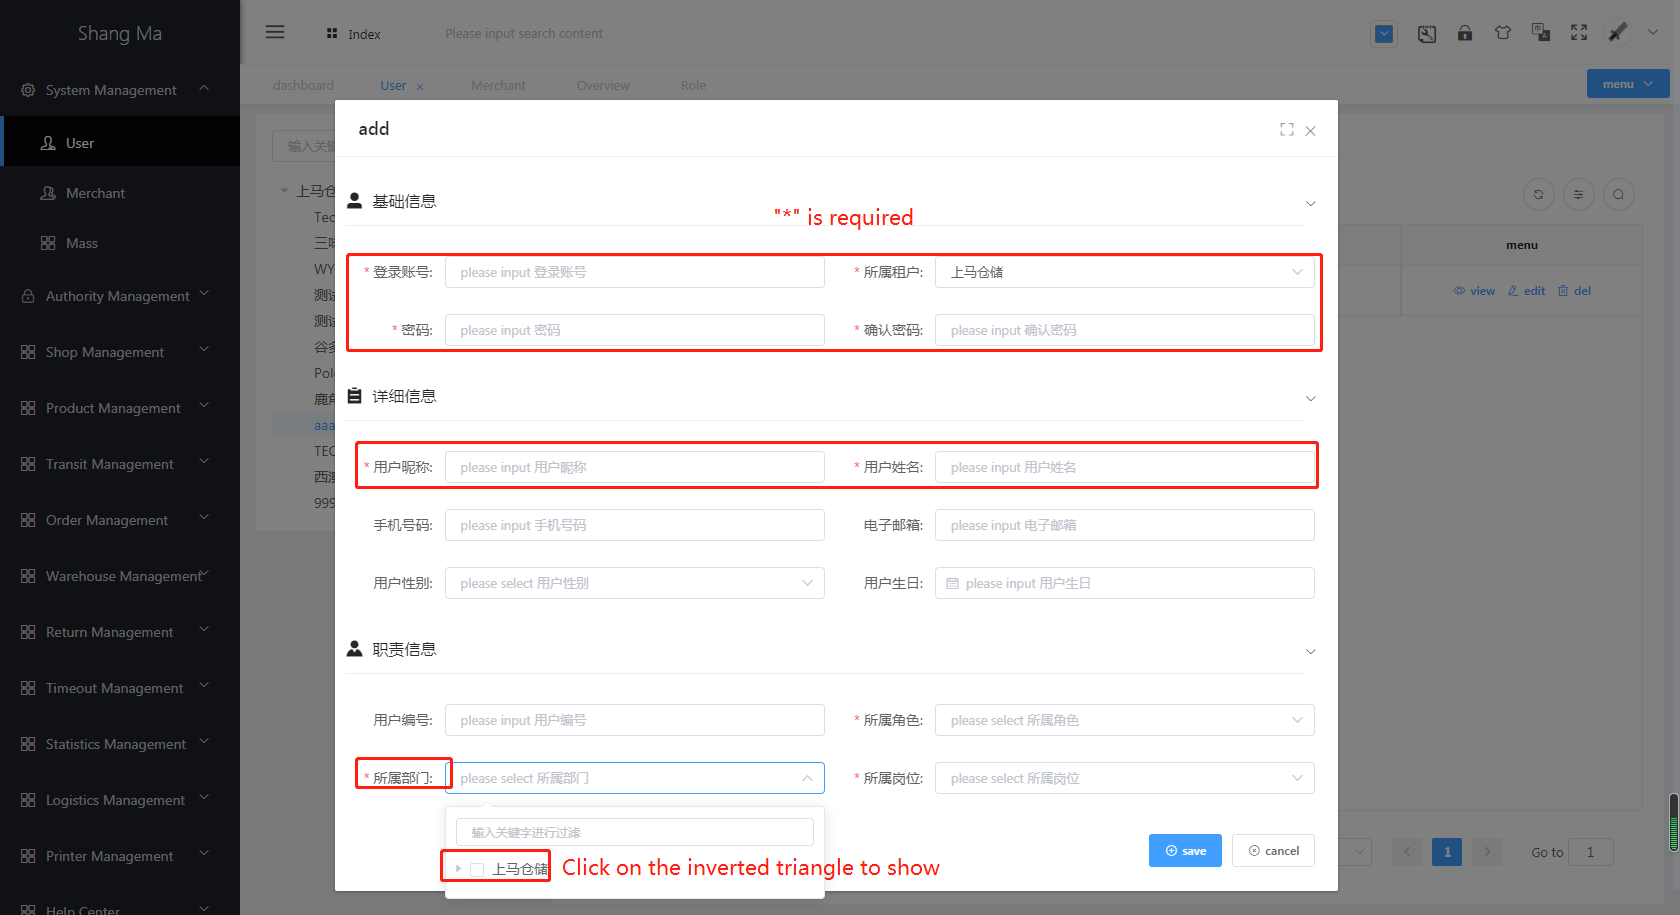
Click the
Savebutton, you can see that the merchant's account has been created
# Step 2: Review the purchase list requested by the merchant
The in transit status is
Apply for warehousingand the list ofRecheck warehousing, displayed here for warehouse verification and reviewEditbutton, you can modify the check quantity. When the quantity isless, you can clickcommodity loss.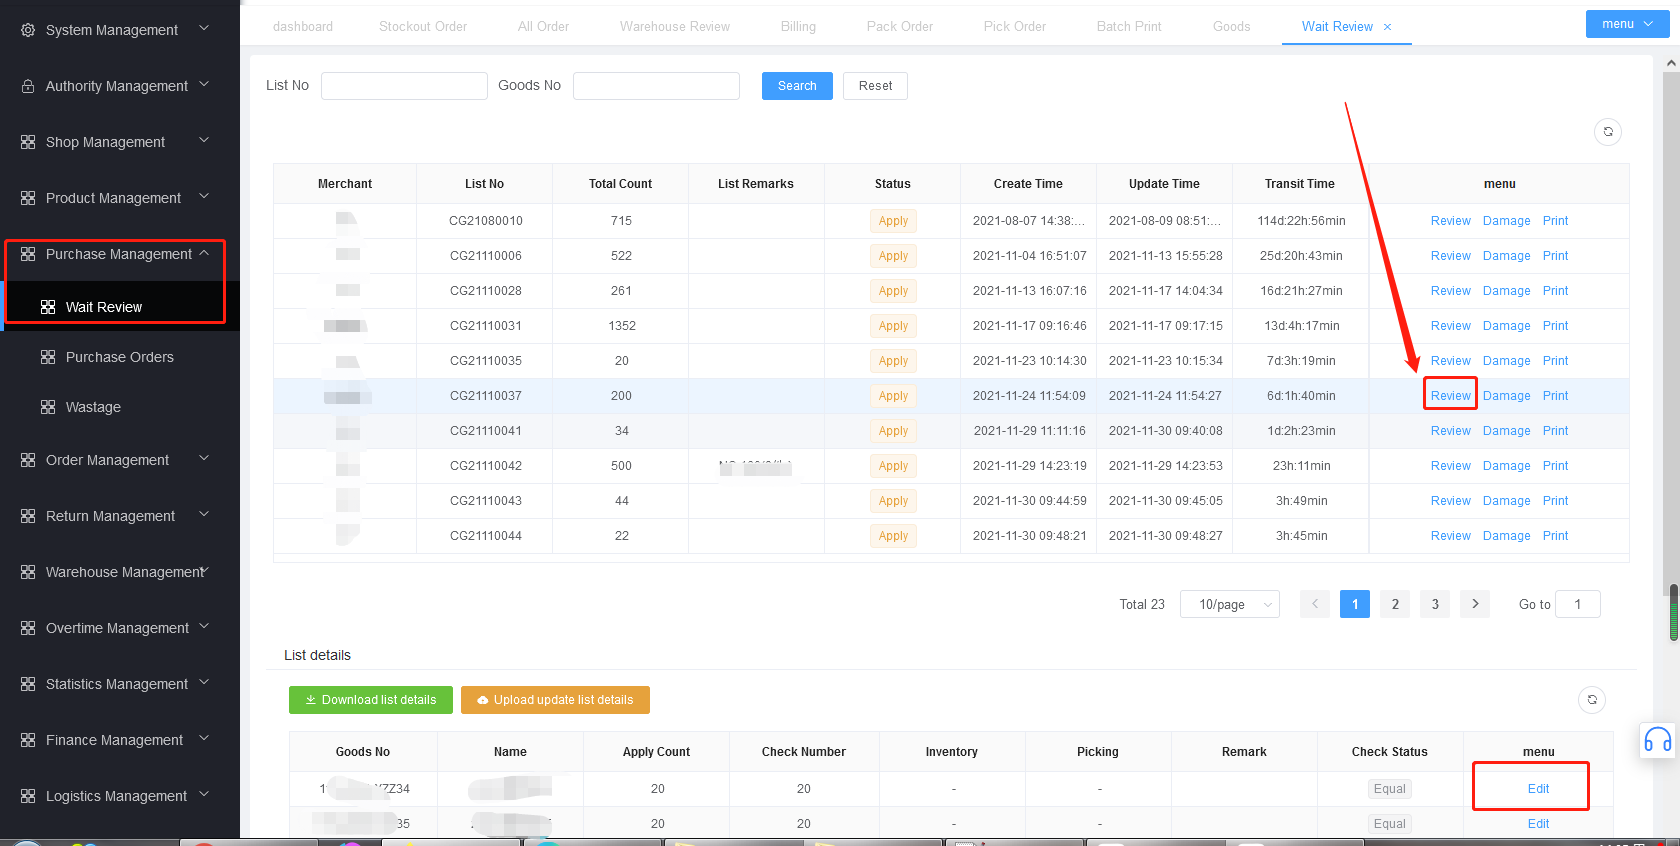
Click
Approve warehousing, you can choose the warehousing area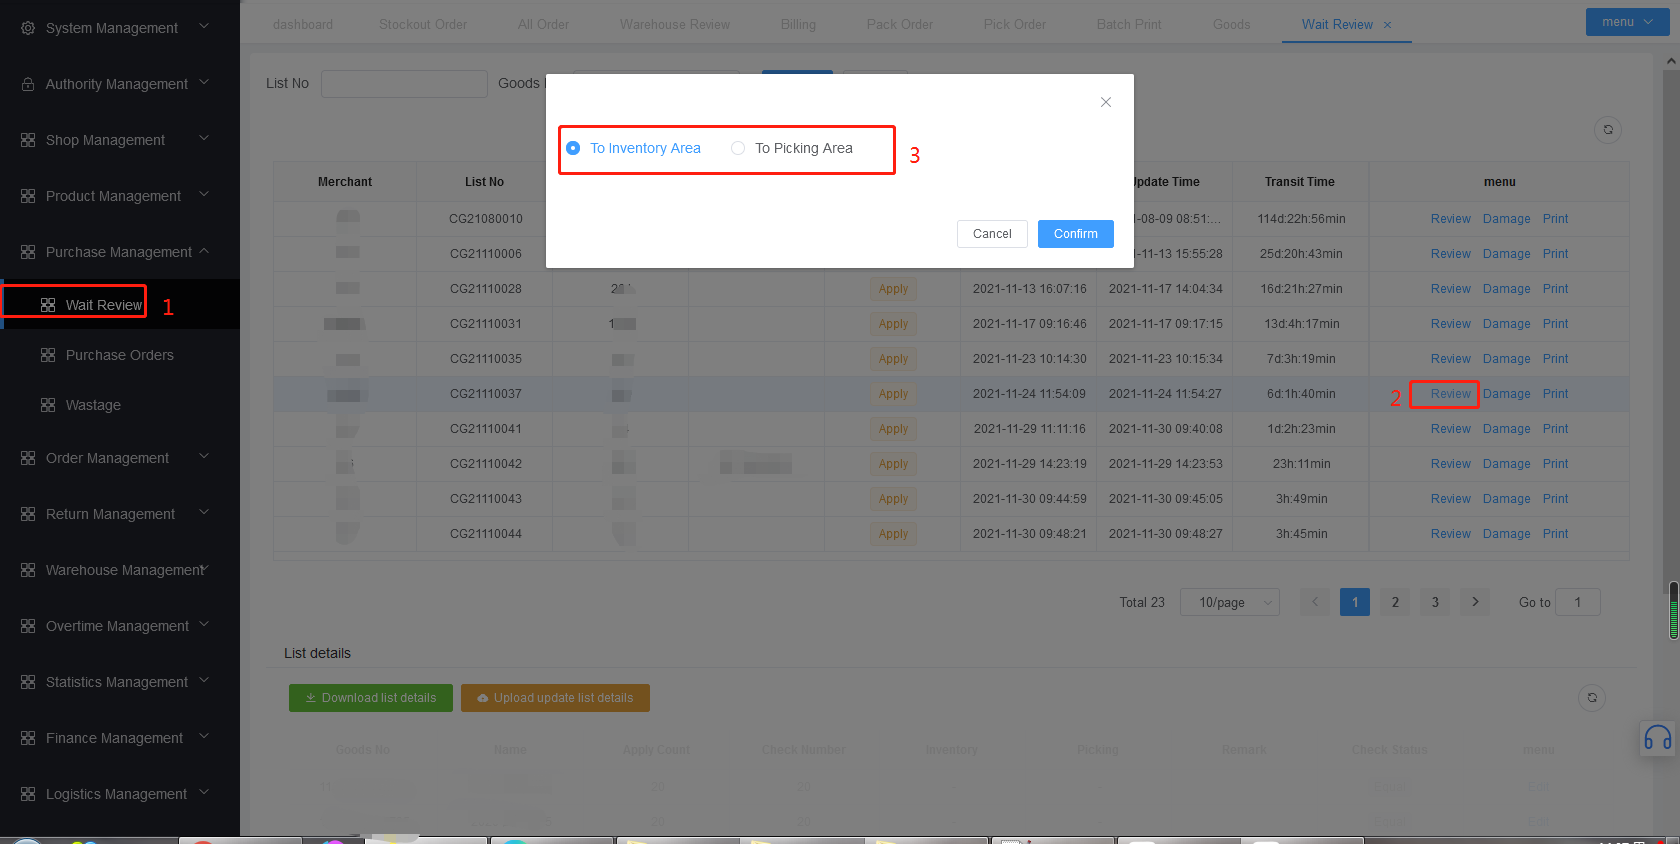
# Step 3: Review the goods, pick the goods, pack them, and leave the warehouse
- Process 1: Generate picking list
- Process 2: Generate batch printing list
# Step 4: Allocation and inventory of warehouse inventory
- Goal: take inventory of the quantity of goods in the in-person warehouse
# Stock Check Steps:
Fuzzy search by commodity code inventory area picking area merchant
Check out the commodities that need to be transferred, and click
Add toClick
Generate Listto generate the corresponding inventory list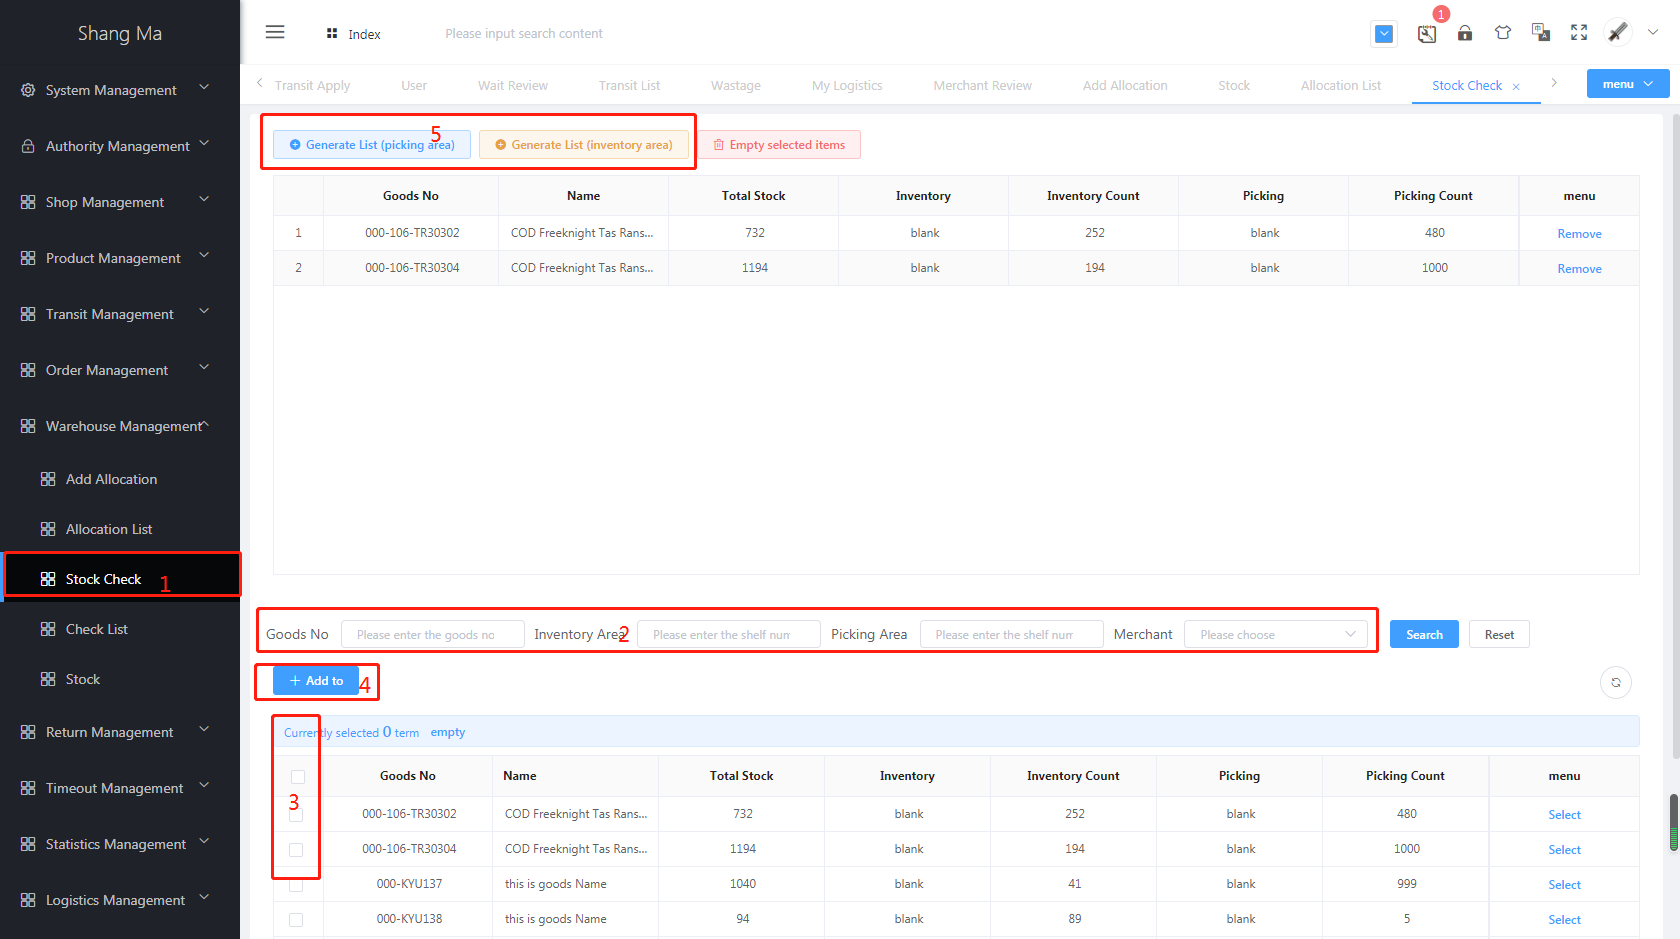
Check List Steps:
Print out the corresponding inventory checklist (the warehouse inventory clerk takes the inventory checklist for offline inventory work)
Print inventory pdf corresponding information (for offline inventory)
Edit fill in the actual count
Click
reviewto complete the inventory operation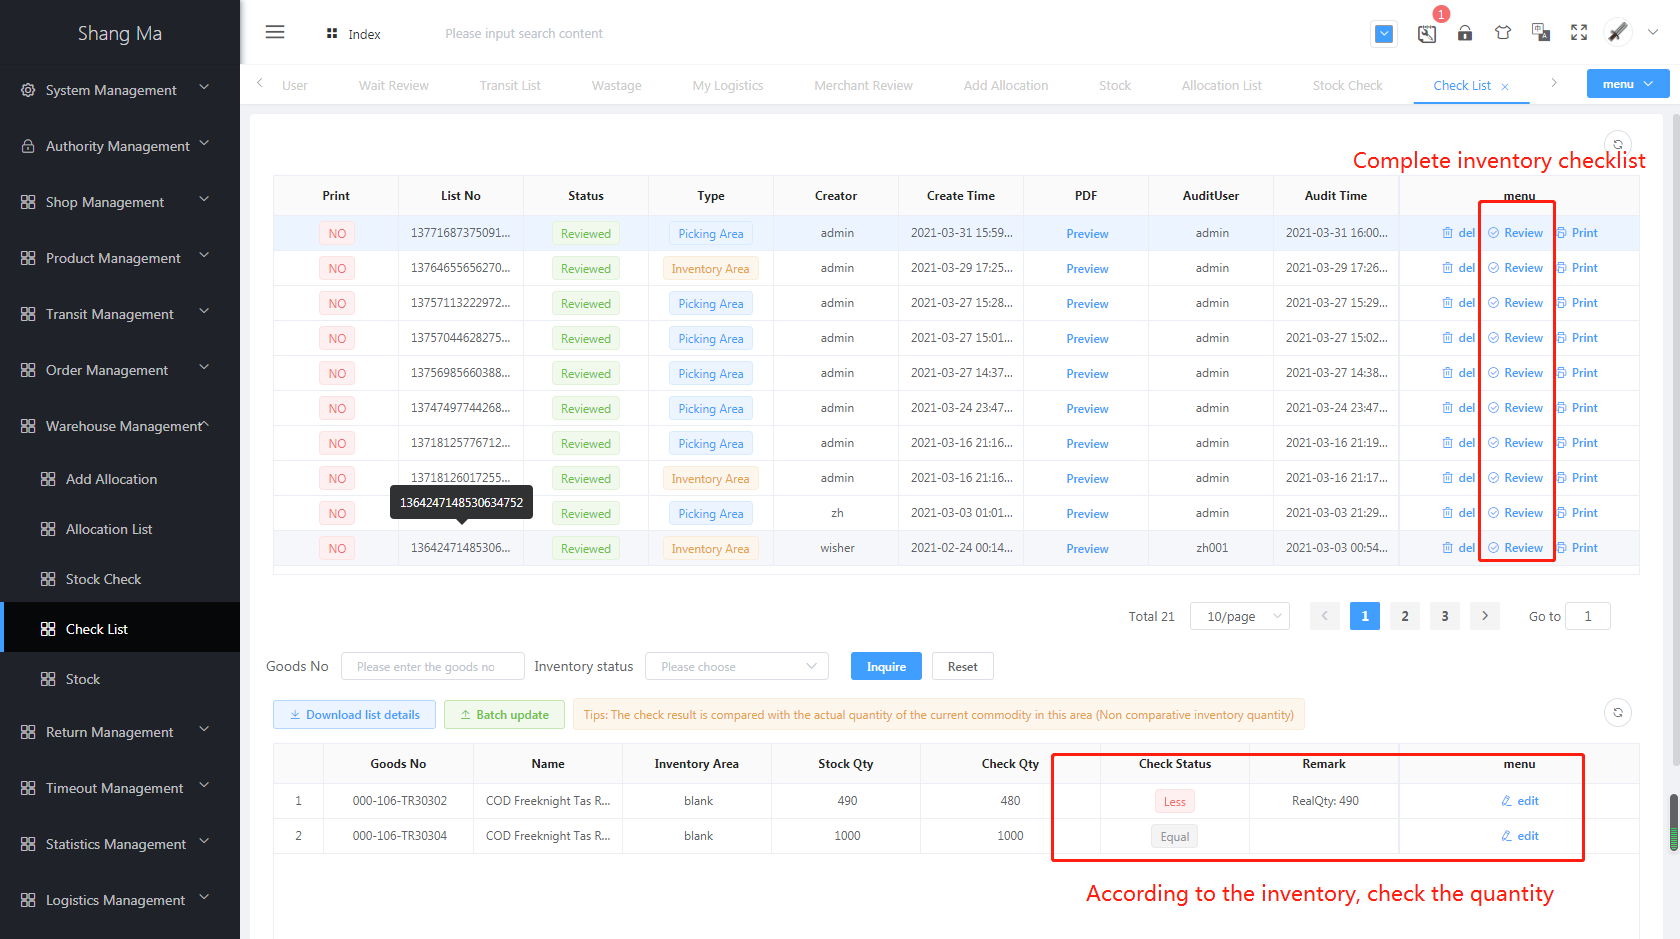
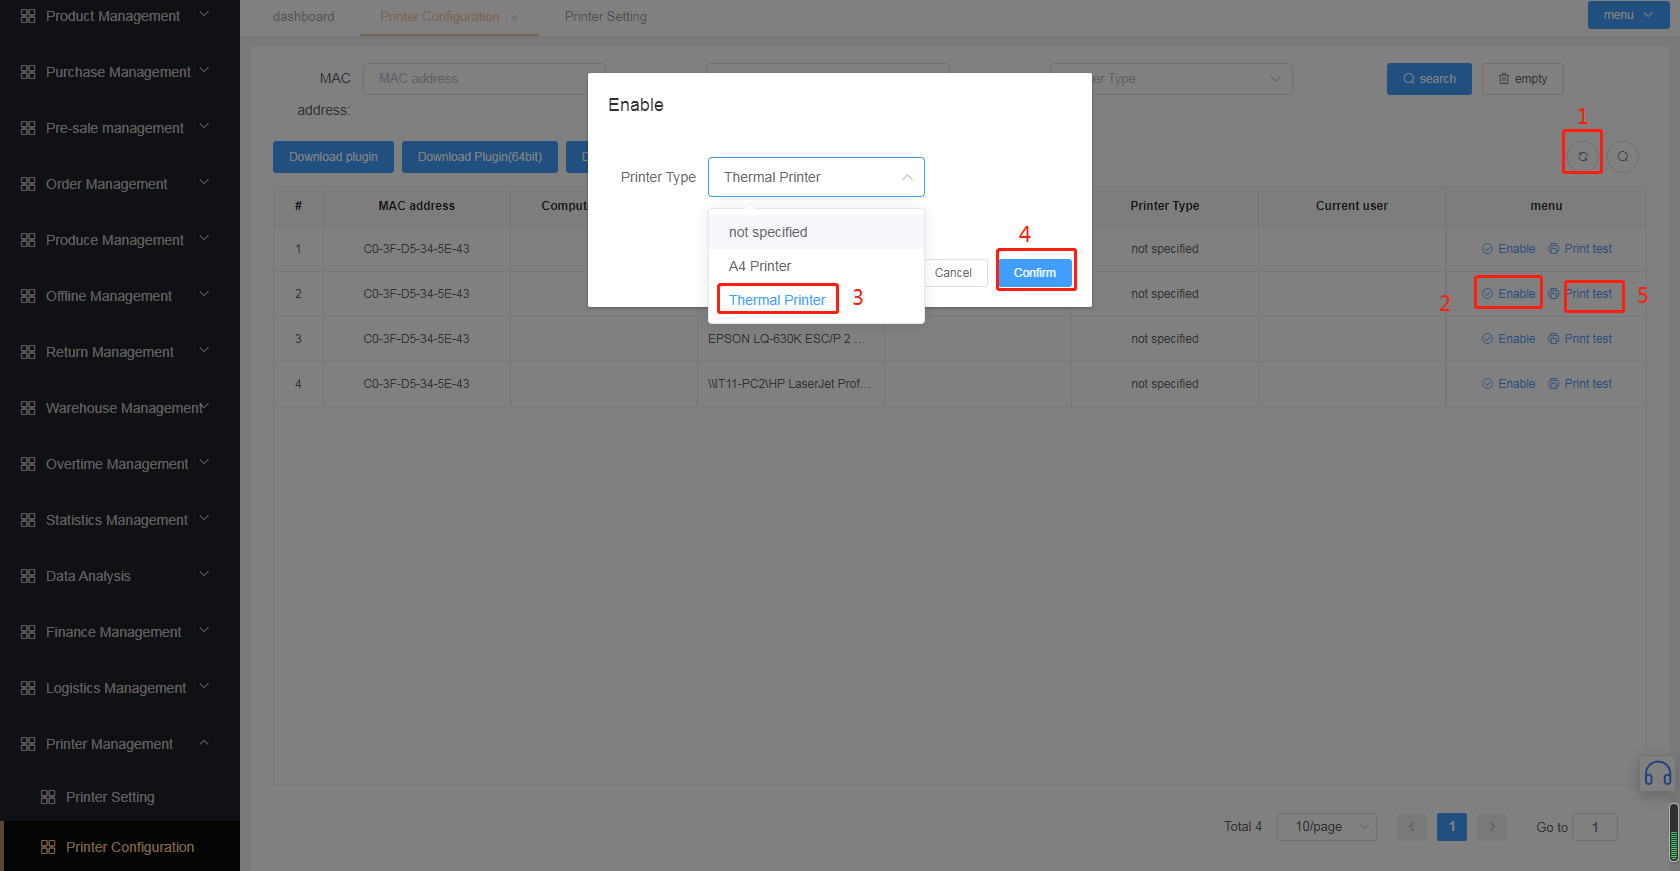
# Step 5: printer management
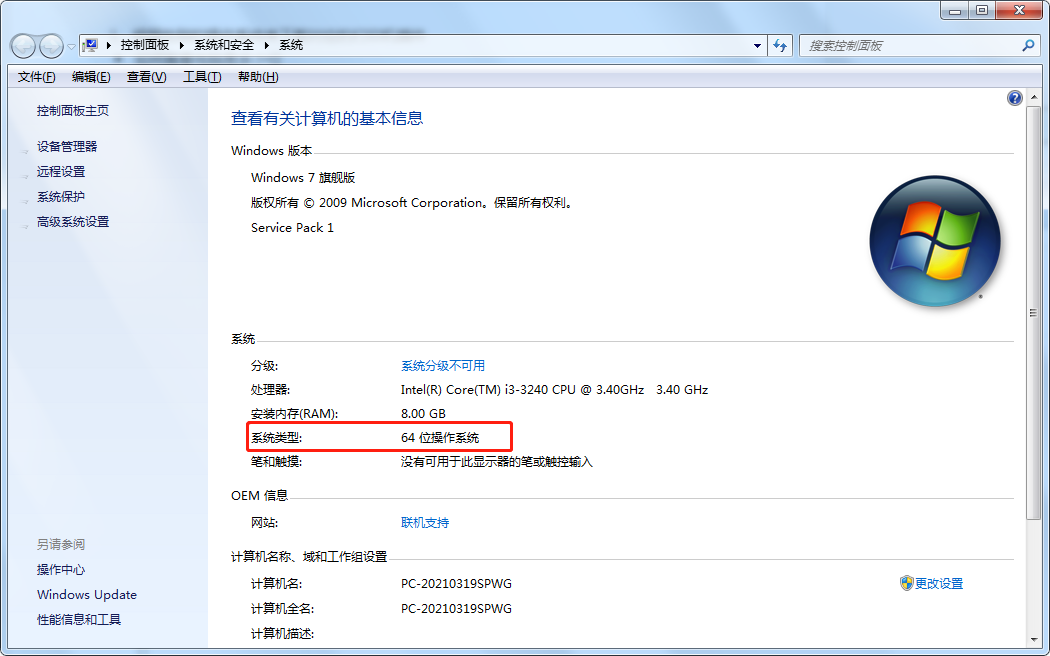
How to check how many bits the computer is
- Click
Computeron the desktop of the computer, then right-click the blank space at the bottom, and selectProperties
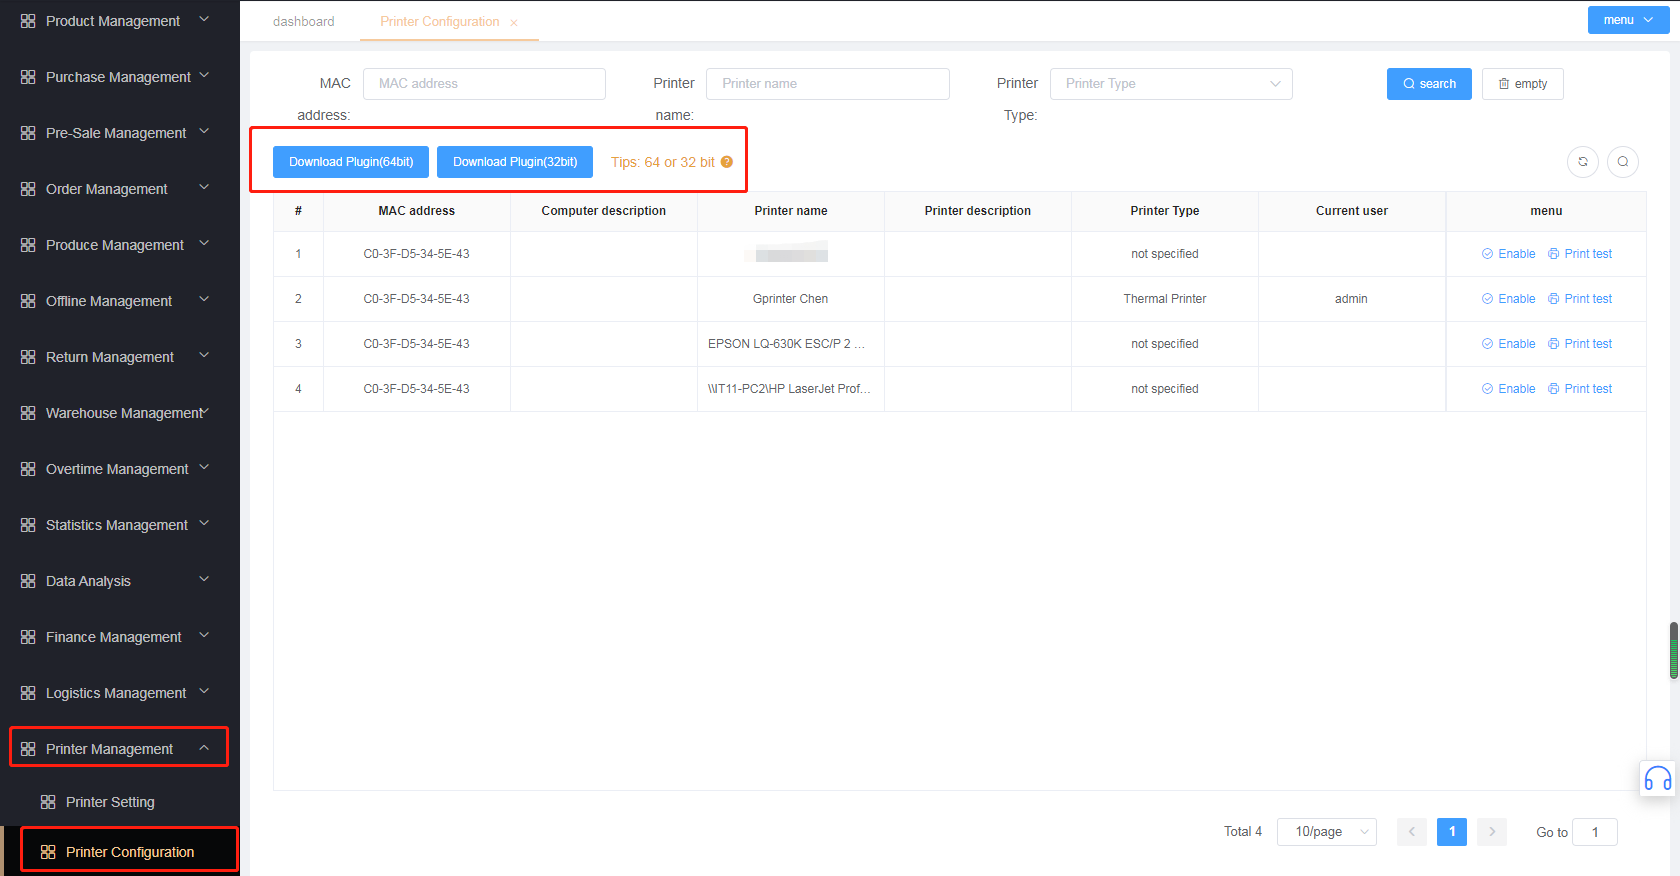
# 5-1: Click Printer Management to select printer configuration, and click to download the plug-in
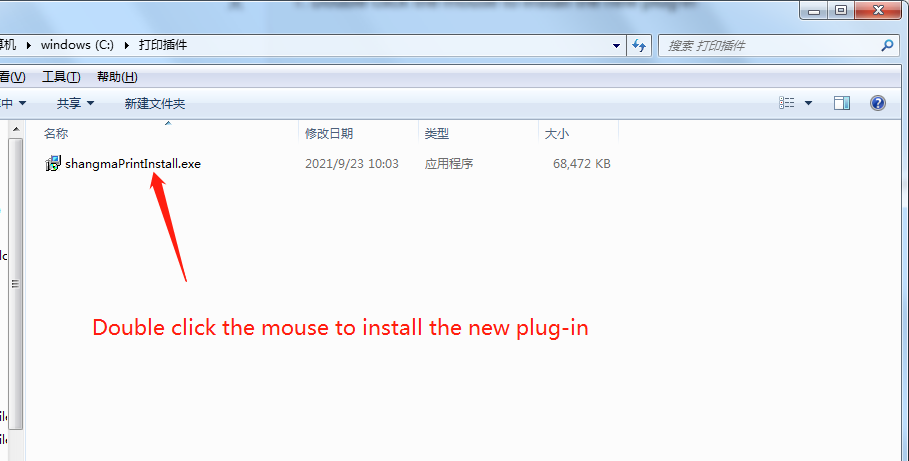
# 5-2: Cut the downloaded plug-in to any disk
Double click the mouse to install the new plug-in
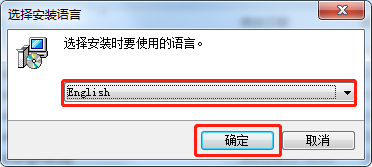
Choose the language you want to use
Check
Create Desktop Shortcut, clickNext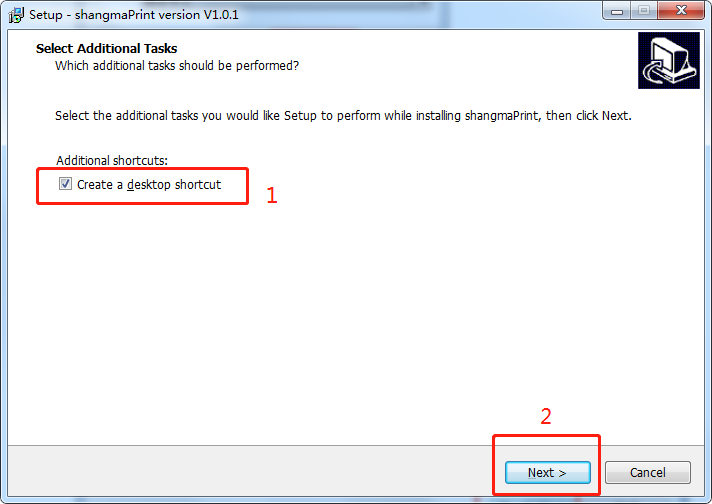
Click
Installand wait for the plug-in to instal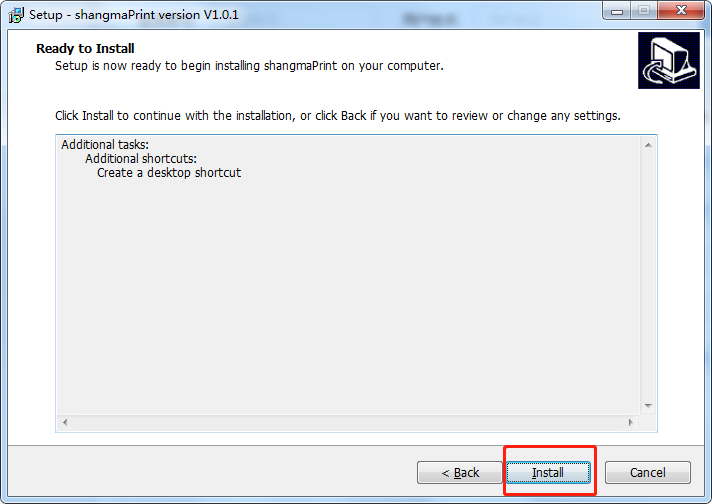
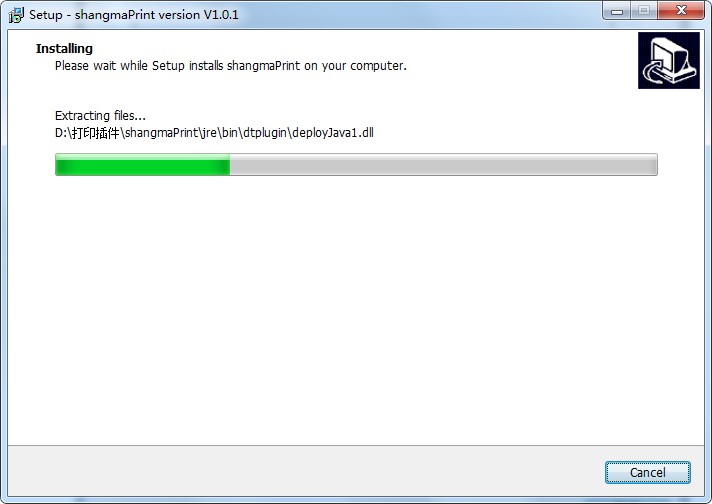
The plug-in installation is complete

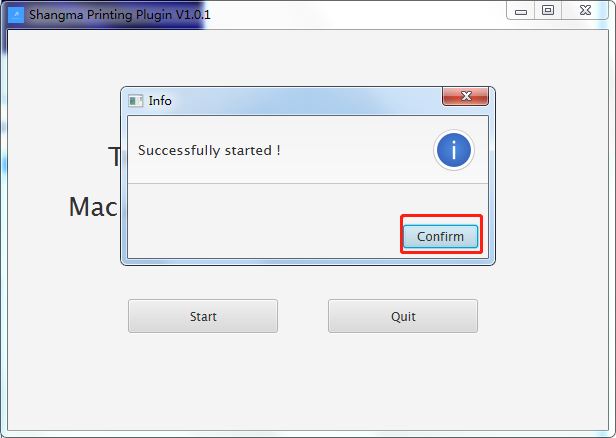
# 5-3: Fill in the warehouse ID and start the plugin
- Fill in the warehouse ID and click
start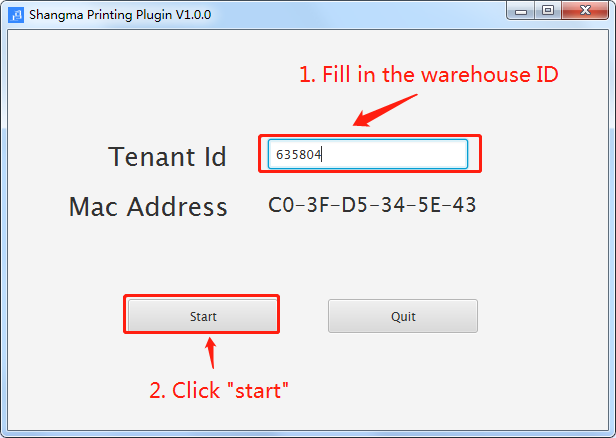
# 5-4: Printer configuration
- Refresh the page and find the corresponding print to enable