# Binding Shop
# 1.Authorized operation of Shopee
Shop Management-shopeeinterface,Add
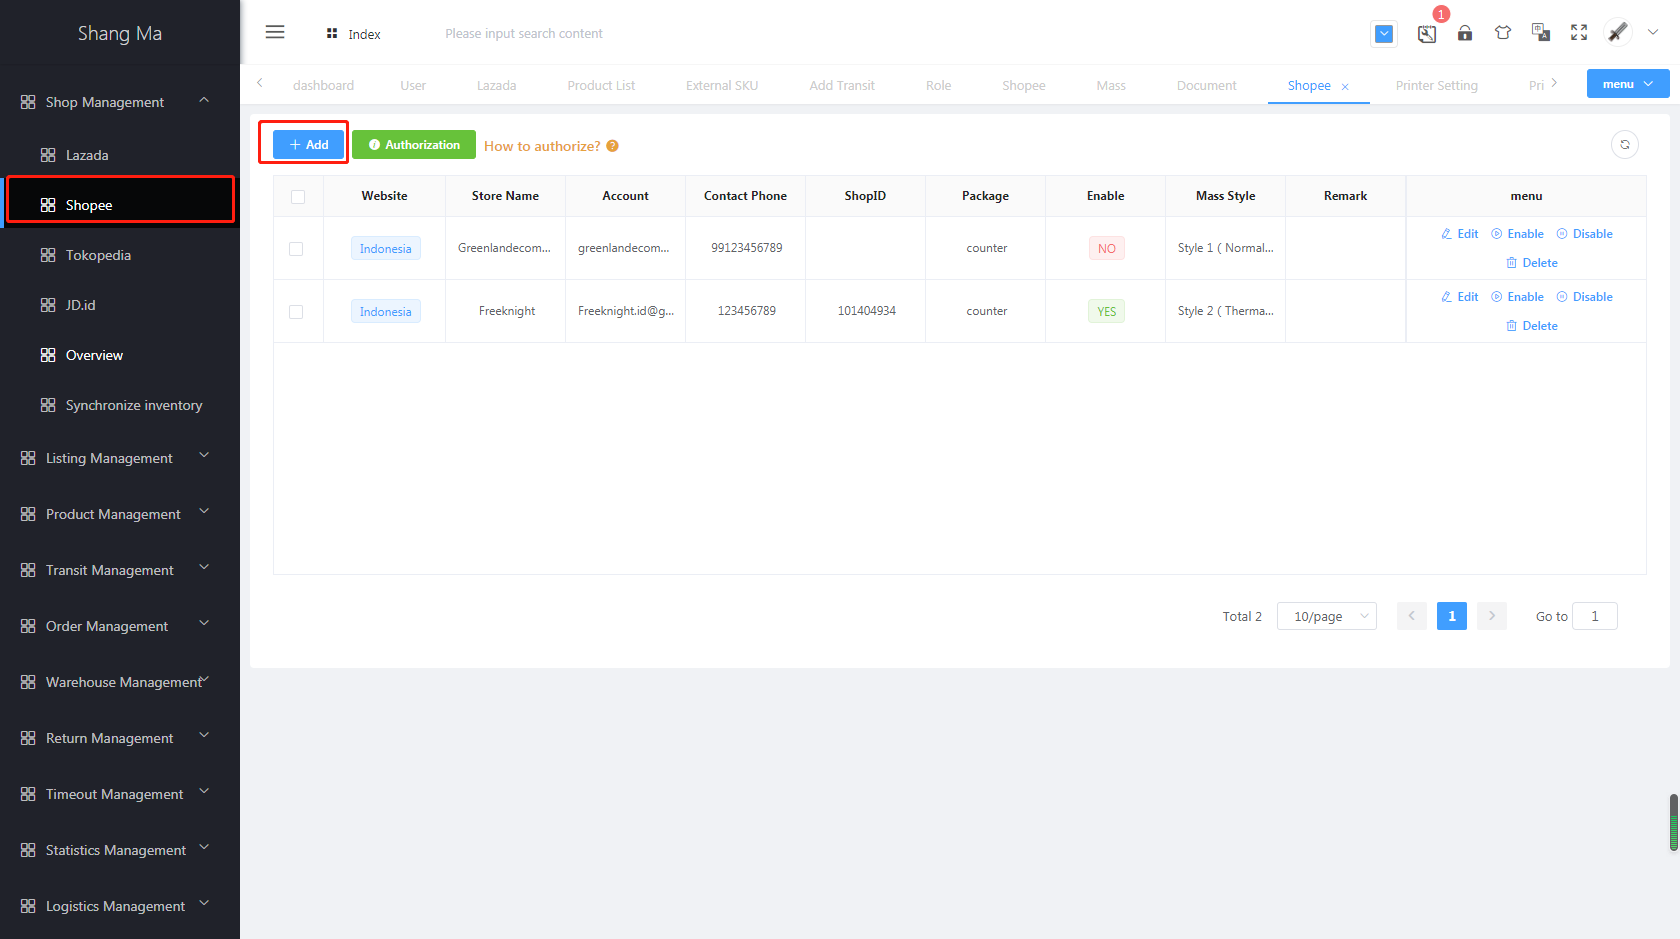
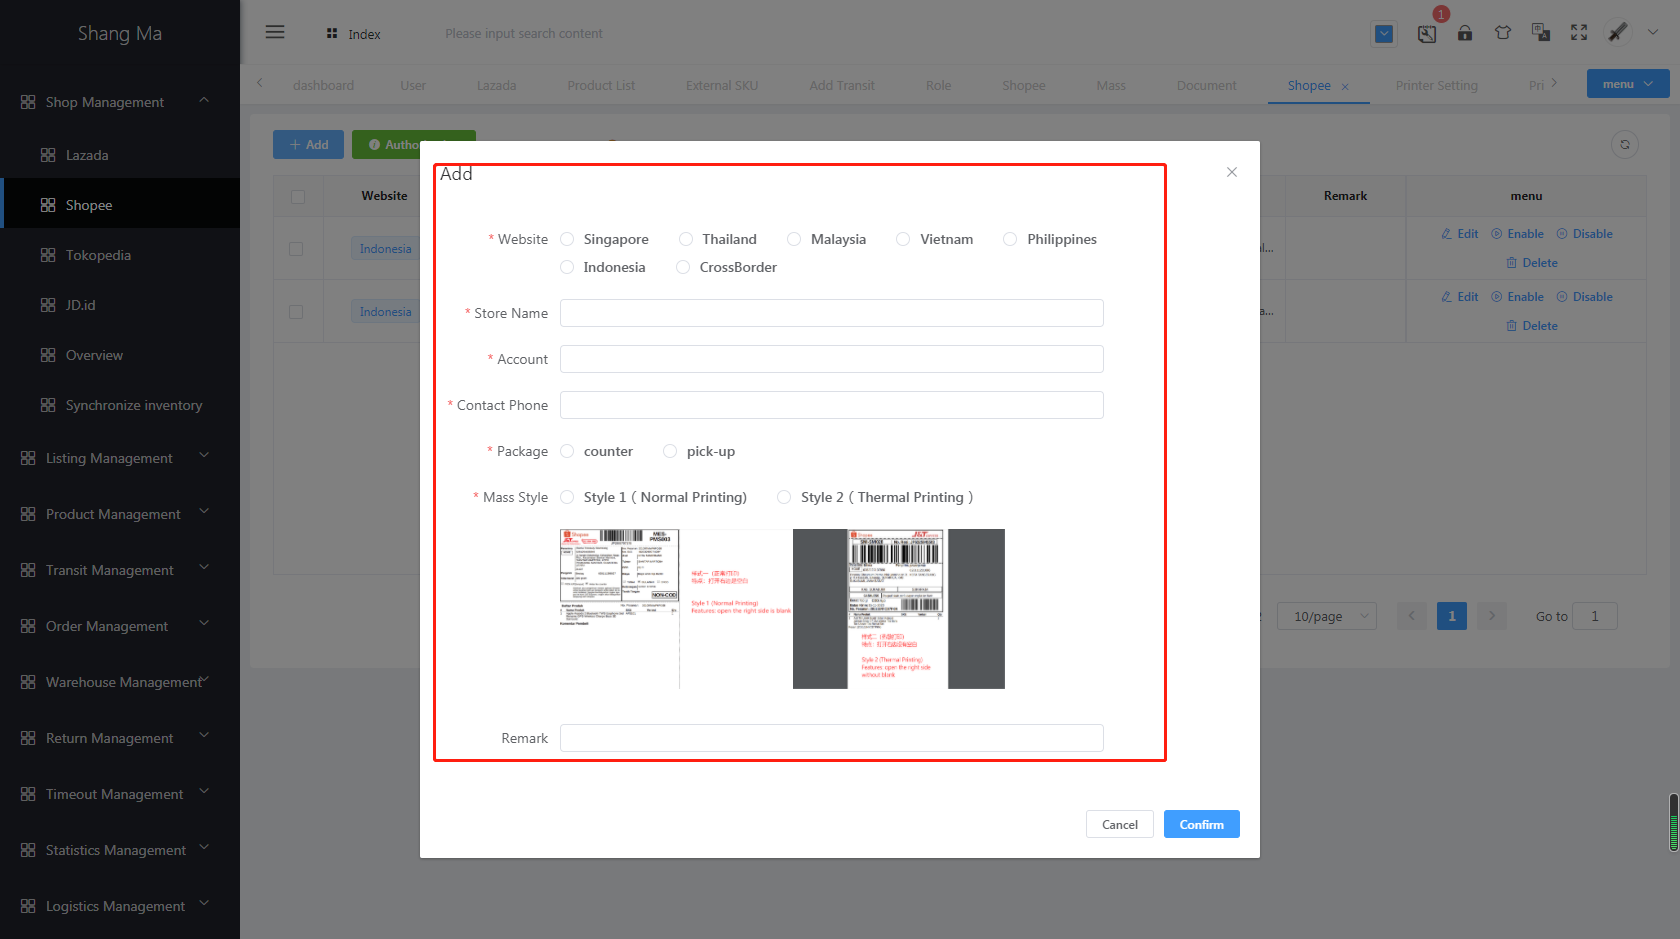
- Package way: recommended to choose
counter - Note: face sheet style
- What style of shopee noodles in your shop, choose which one
# 1-1: Authorize Shopee Account
Shop Management-Shopeeinterface,authorize- Note: Check the account first, and then click
Authorization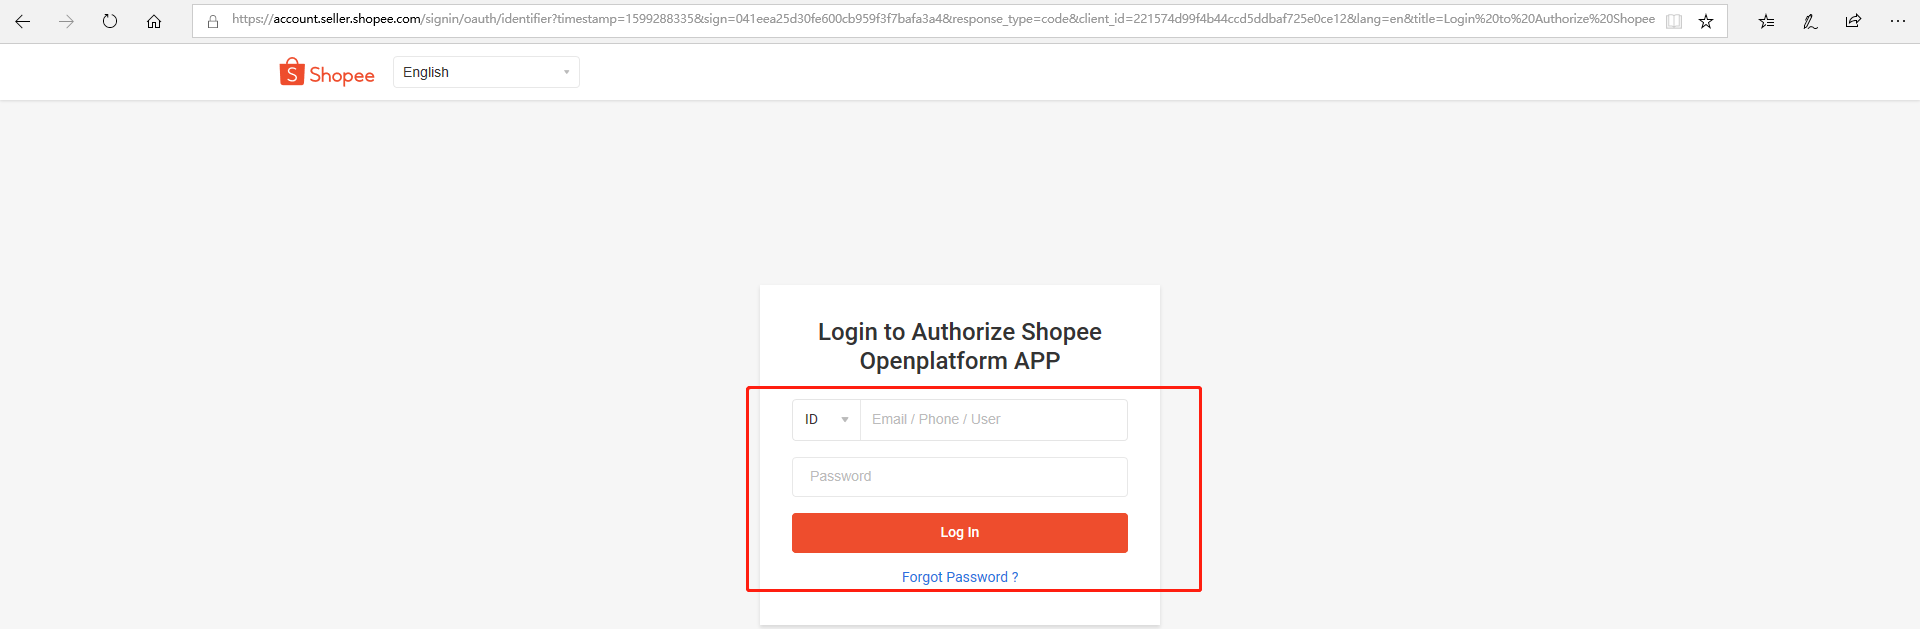
- Select the corresponding country and fill in the shopee account password.
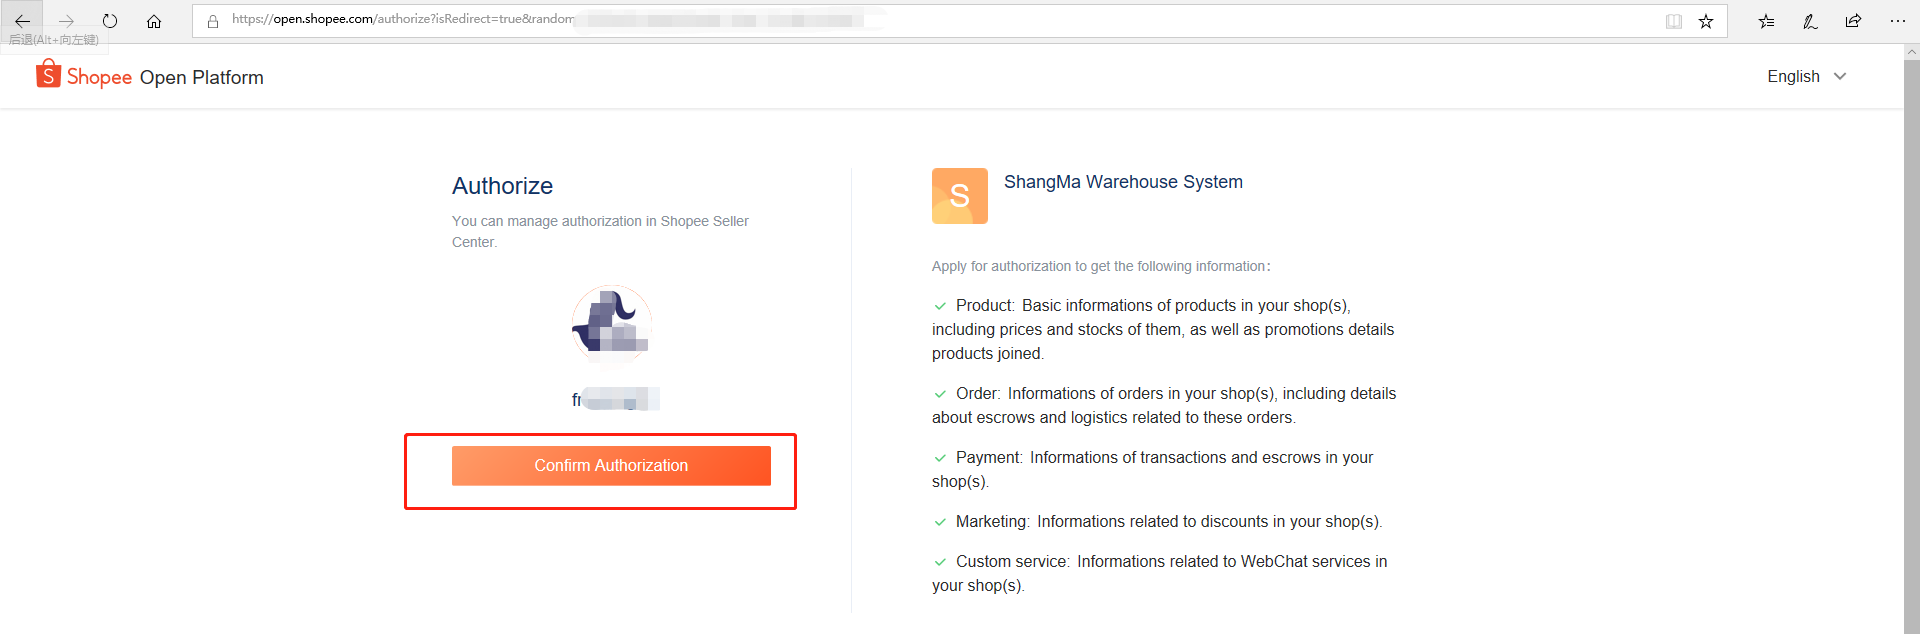
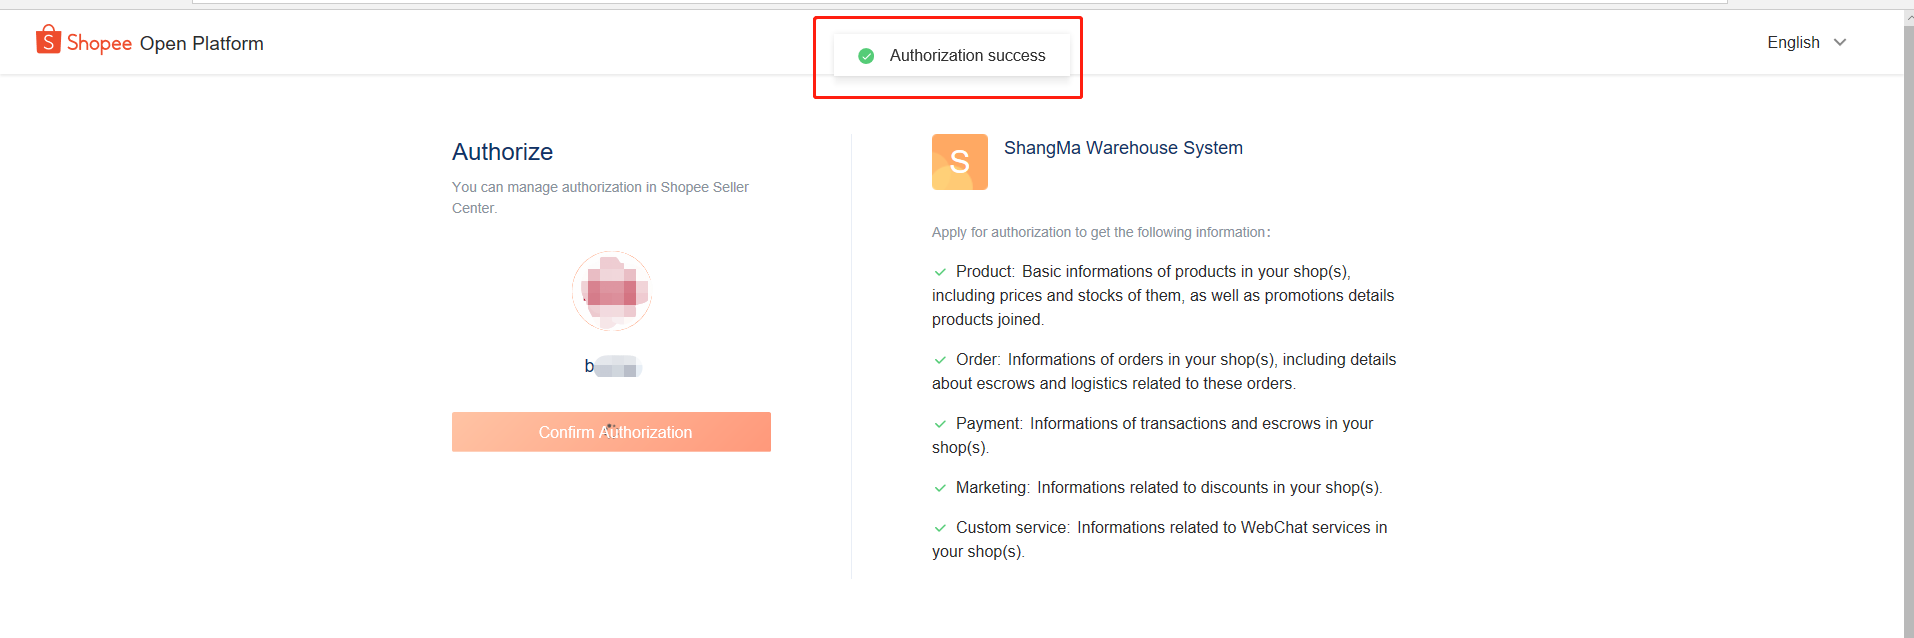
- Click the
Confirm Authorizationbutton, Authorization success appears
- Finally prompt success
# 2. Authorized operation of Lazada
# 2-1: New
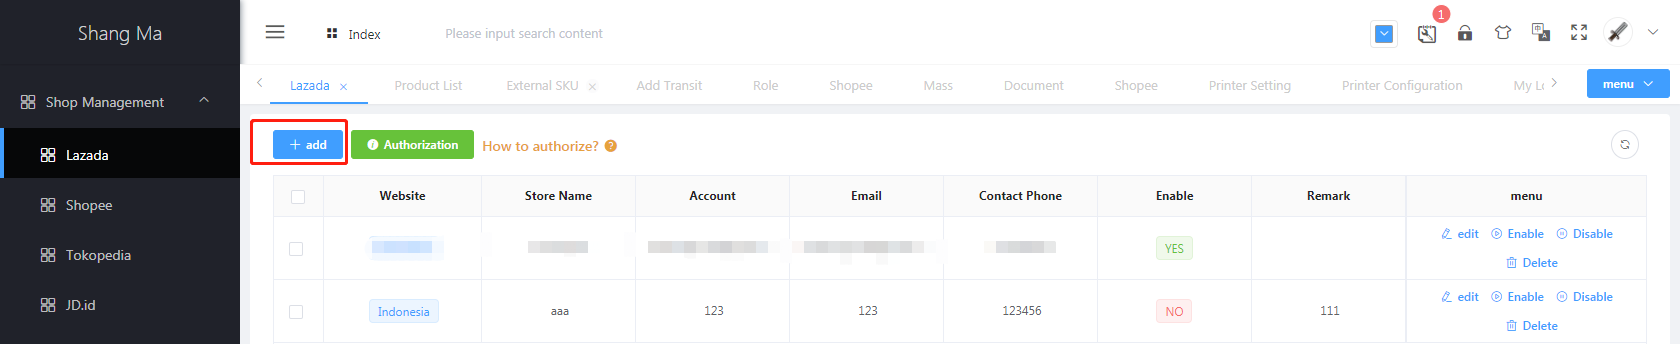
- In the
Shop Management-Lazadainterface, clickAdd
# 2-2: Fill in the account number and email address
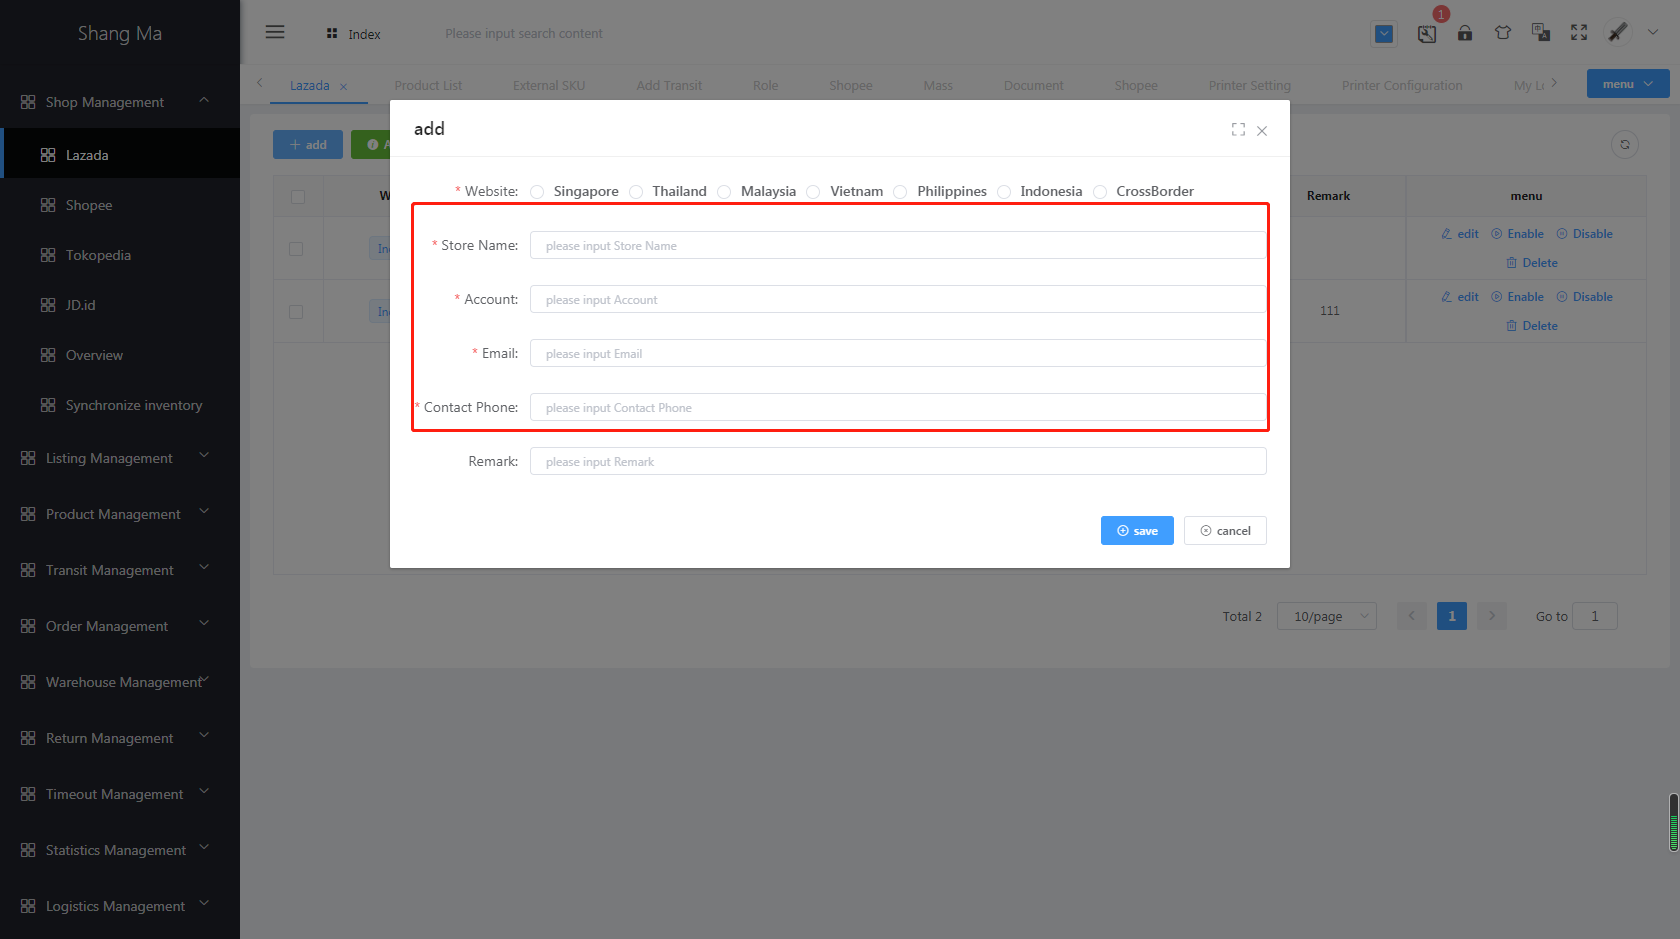
- Enter the corresponding login account of Lazada (login with Email) and email, click
Save
# 2-3: Authorization
- Click
Authorizeto automatically jump to the authorization interface of lazada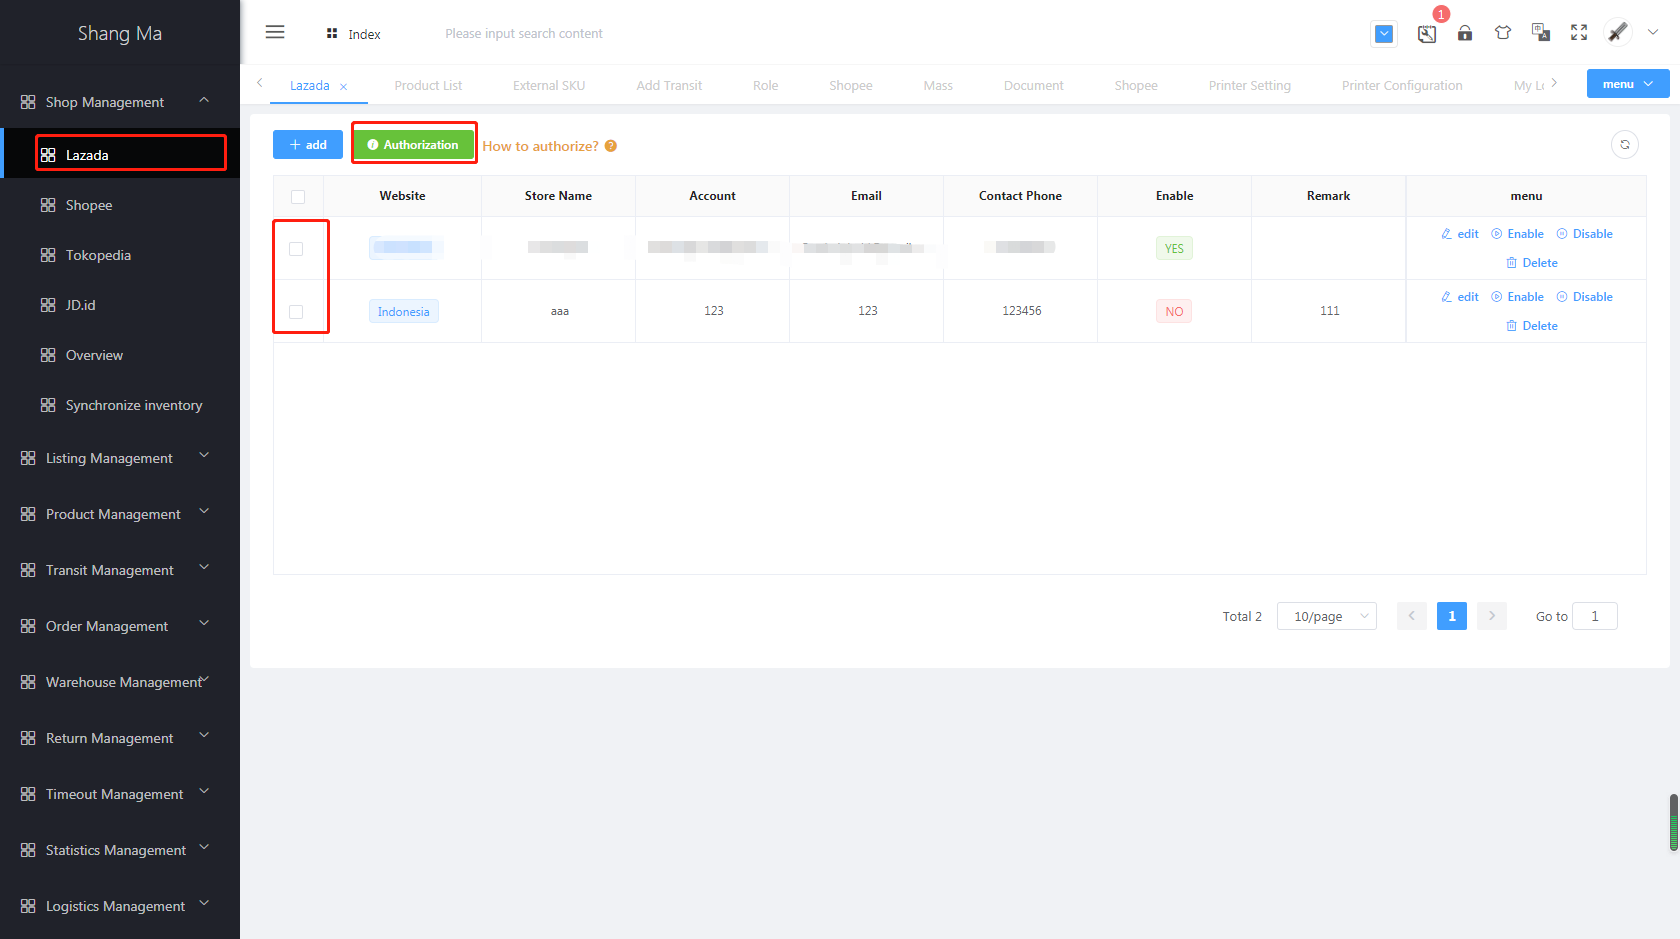
# 2-4: Submit on lazada pl
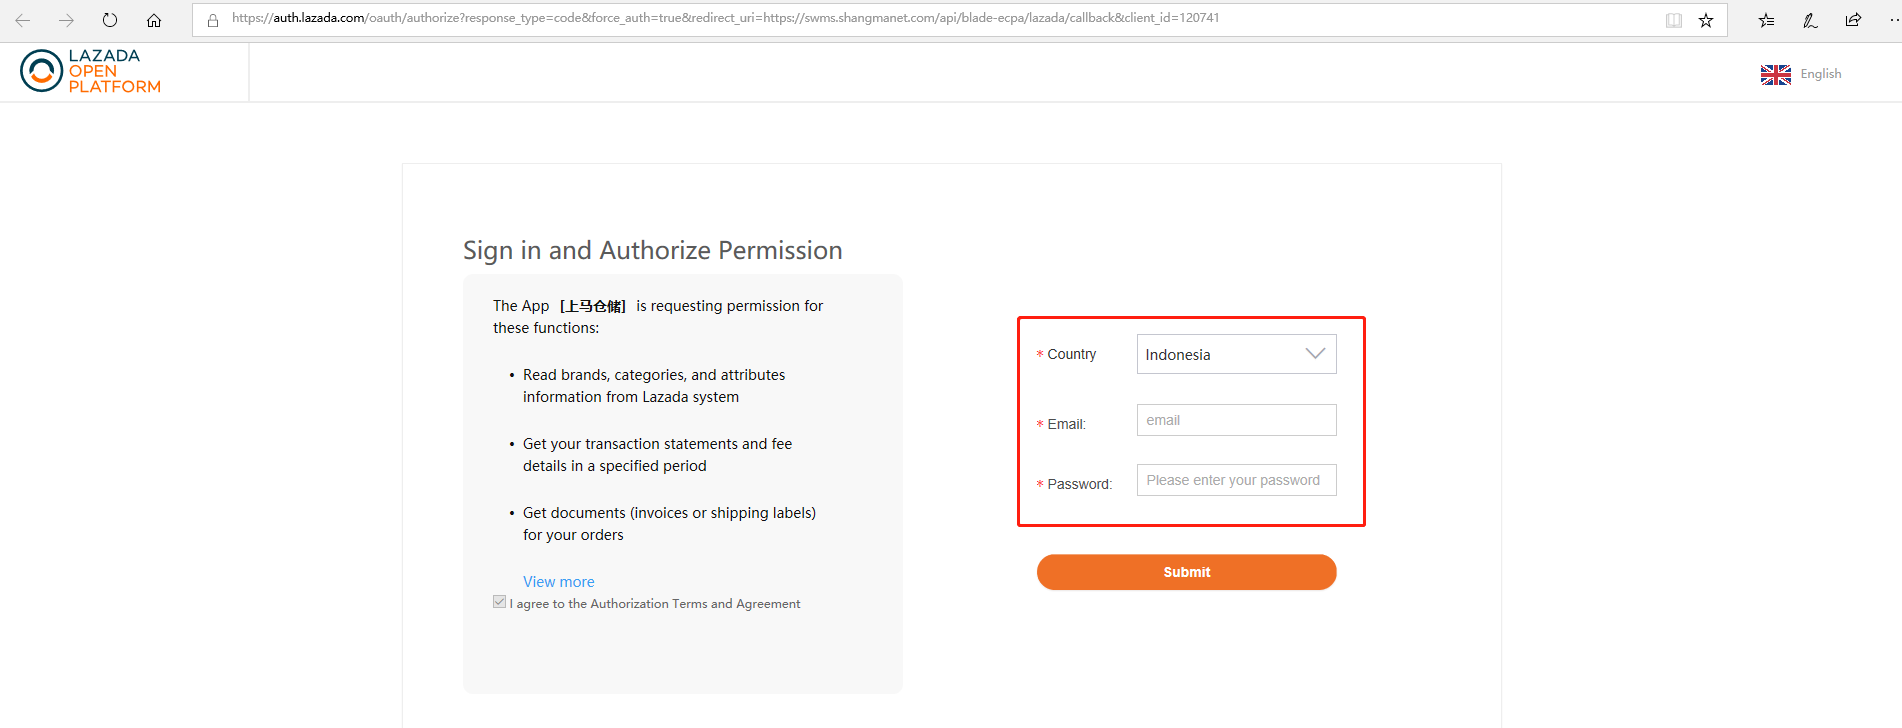
- Select the corresponding country, fill in the corresponding lazada account password, and click
Submit.
# 2-5: Platform authorization
- Refresh the page, accesToken and refreshToken have numerical values, which means the addition is successful
# 3. Authorized operation of Tokopedia
# premise:
- Upgraded to Official Store or Power Merchant
- Already activated && verified email
- Not authorized to other third-party ERP software (if you have authorized third-party ERP software, please contact us)
# 3-1: Obtain the store domain name (pre-condition)
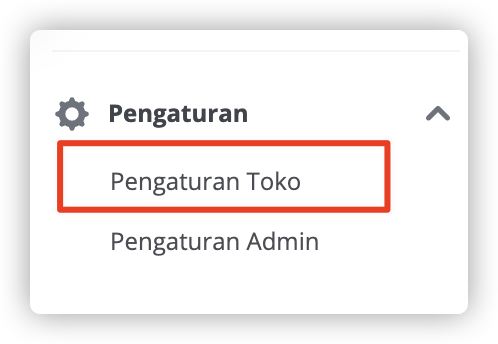
Merchants visit the Official Link (opens new window), enter the seller center
The Pengaturan Toko menu in the lower left corner of the merchant visit page, as shown in the figure below
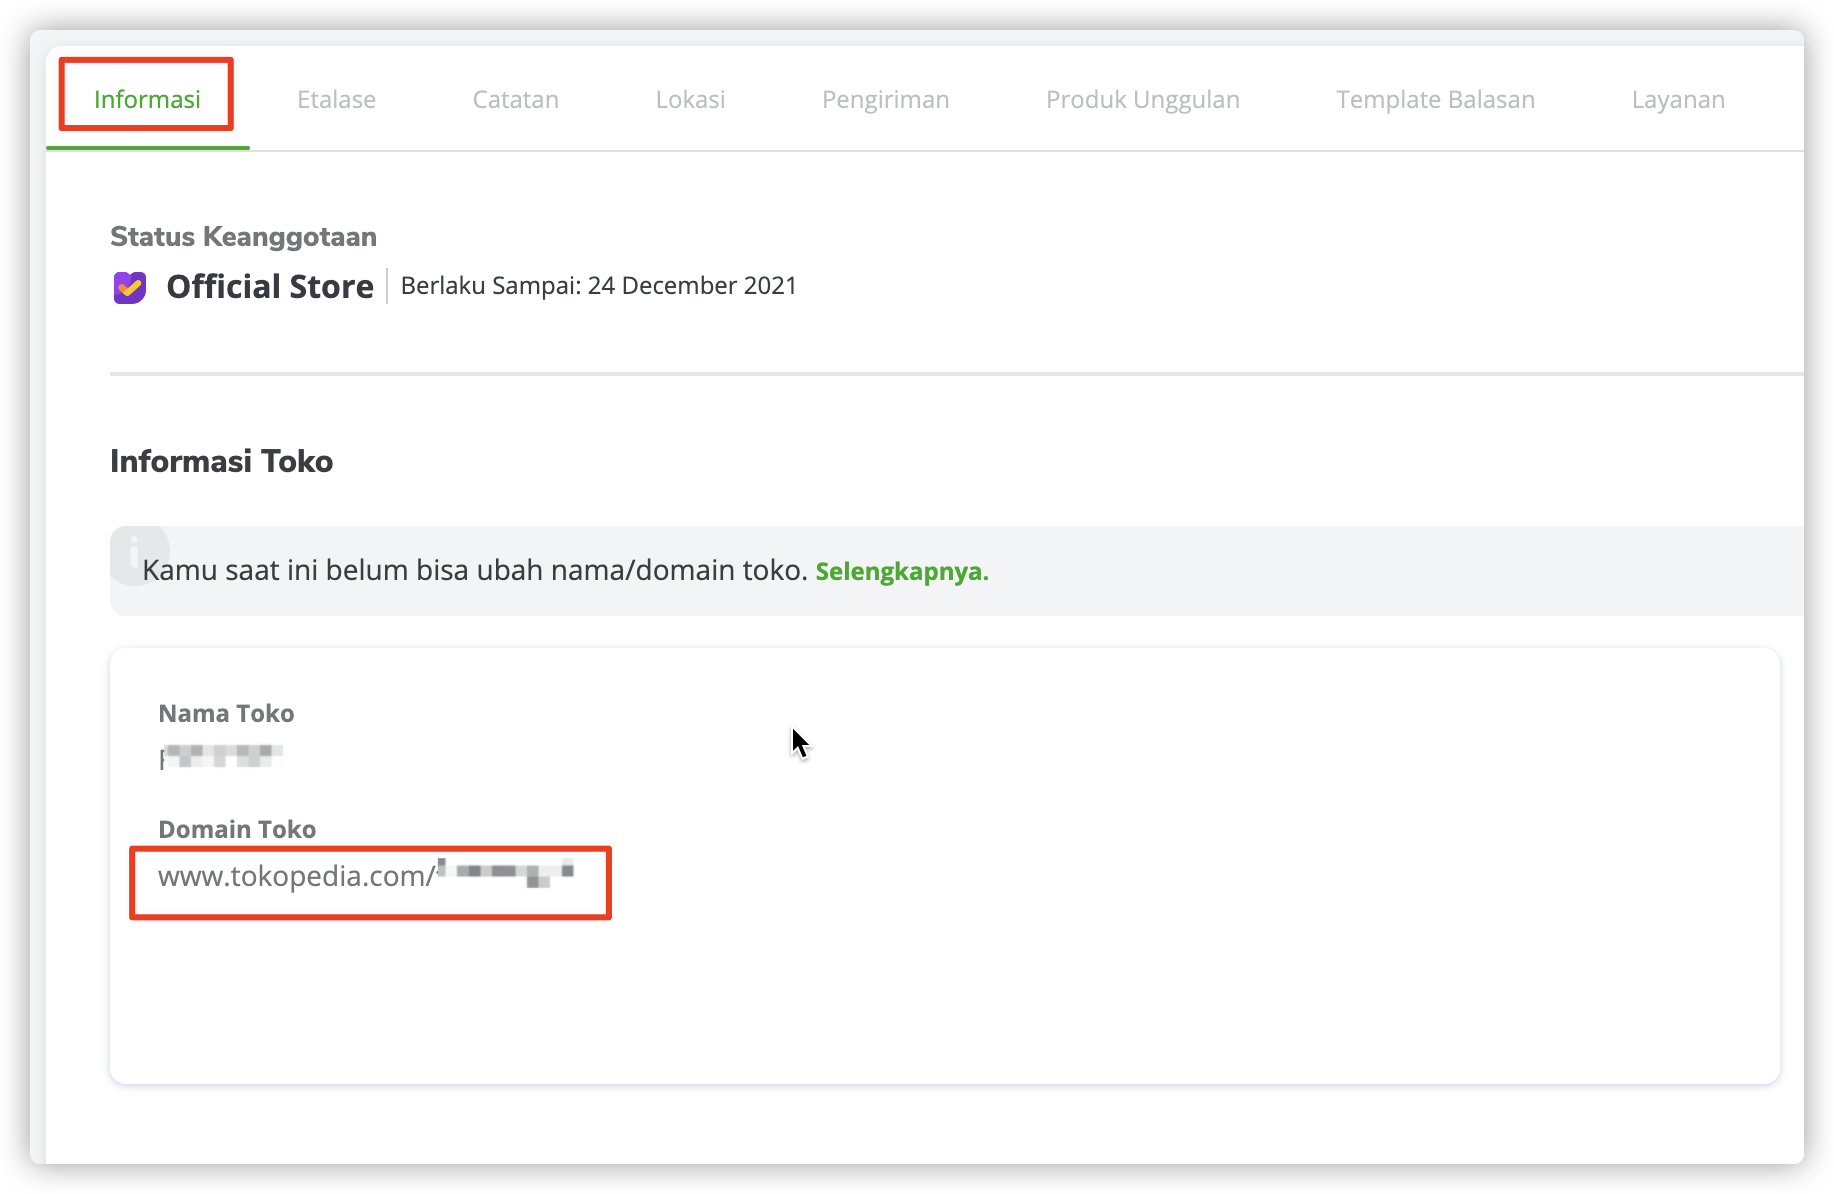
The content in the red box below the picture is the store domain name
# 3-2: Add business information
Enter
Shop Management-Tokopedia, clickAdd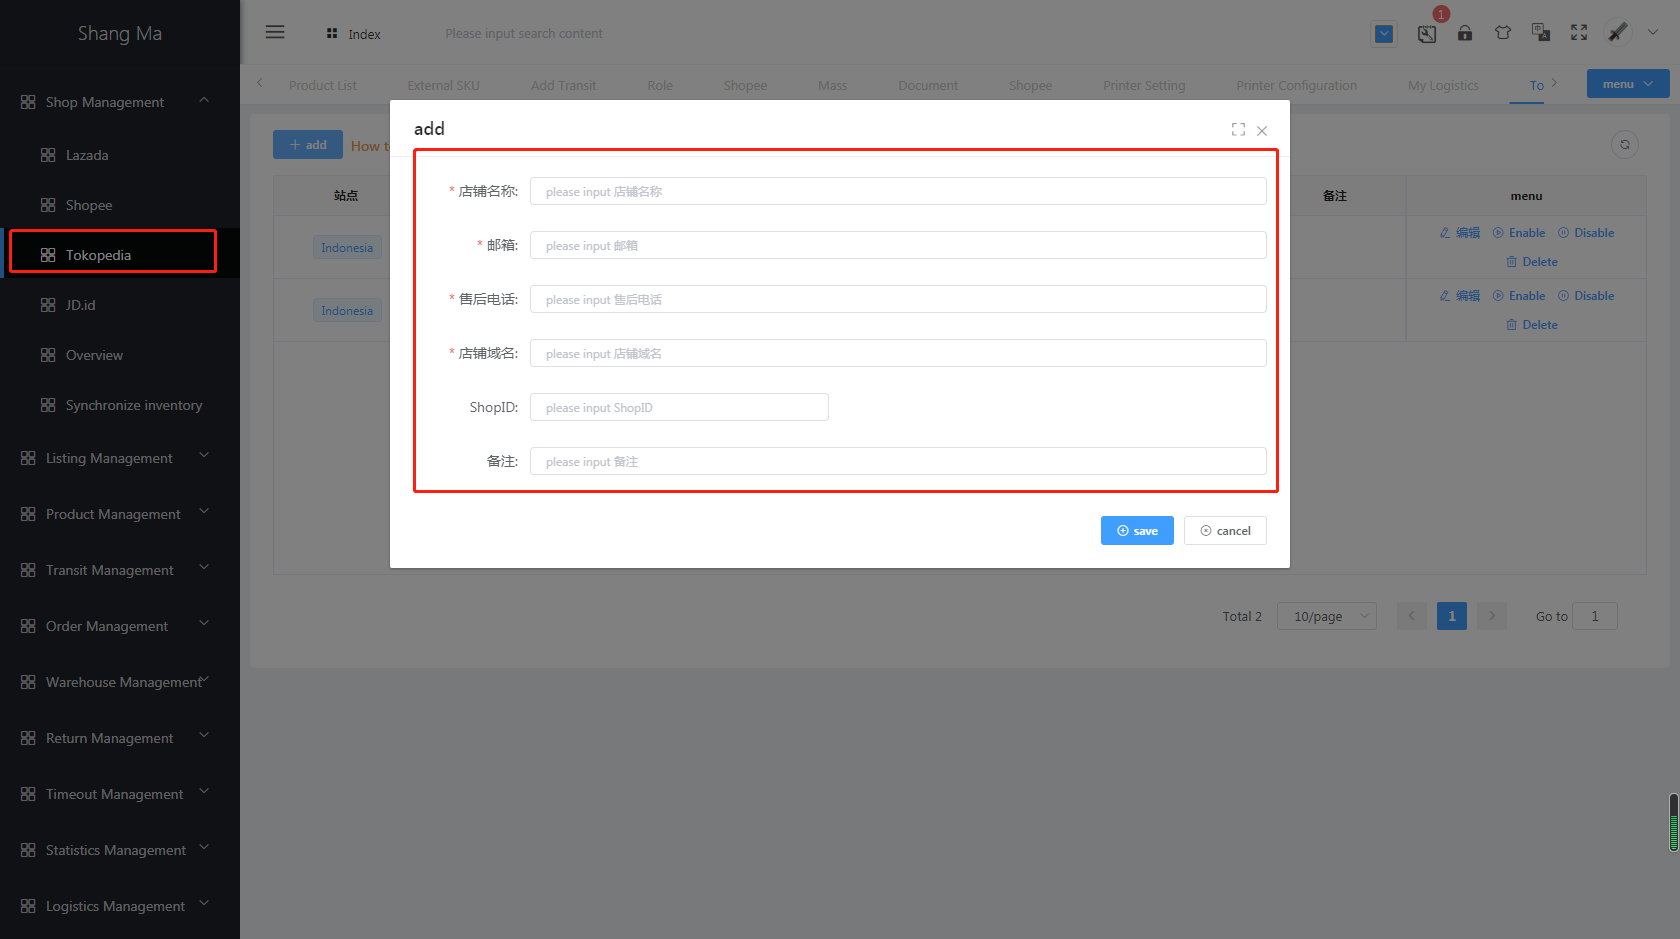
- Select the site, fill in the store name, email address, domain name, remarks (optional), and finally save
# 3-3: Wait for tokopedia platform review
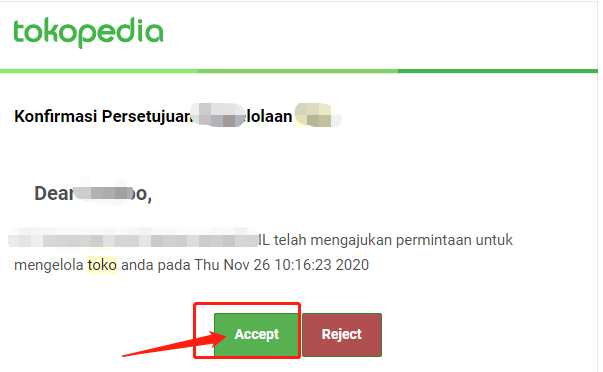
- Merchants are waiting for tokopedia's official push email, and click
Acceptwhen they receive - Proactively contact the business manager to increase the review speed
# 3-4: Platform update ShopID
- After clicking
Accept, contact the platform to update the shopID
# 4. Authorized operation of JD.id
# 4-1: Merchant creates JD.ID store
- Menu
Shop Management-JD.id, fill in the information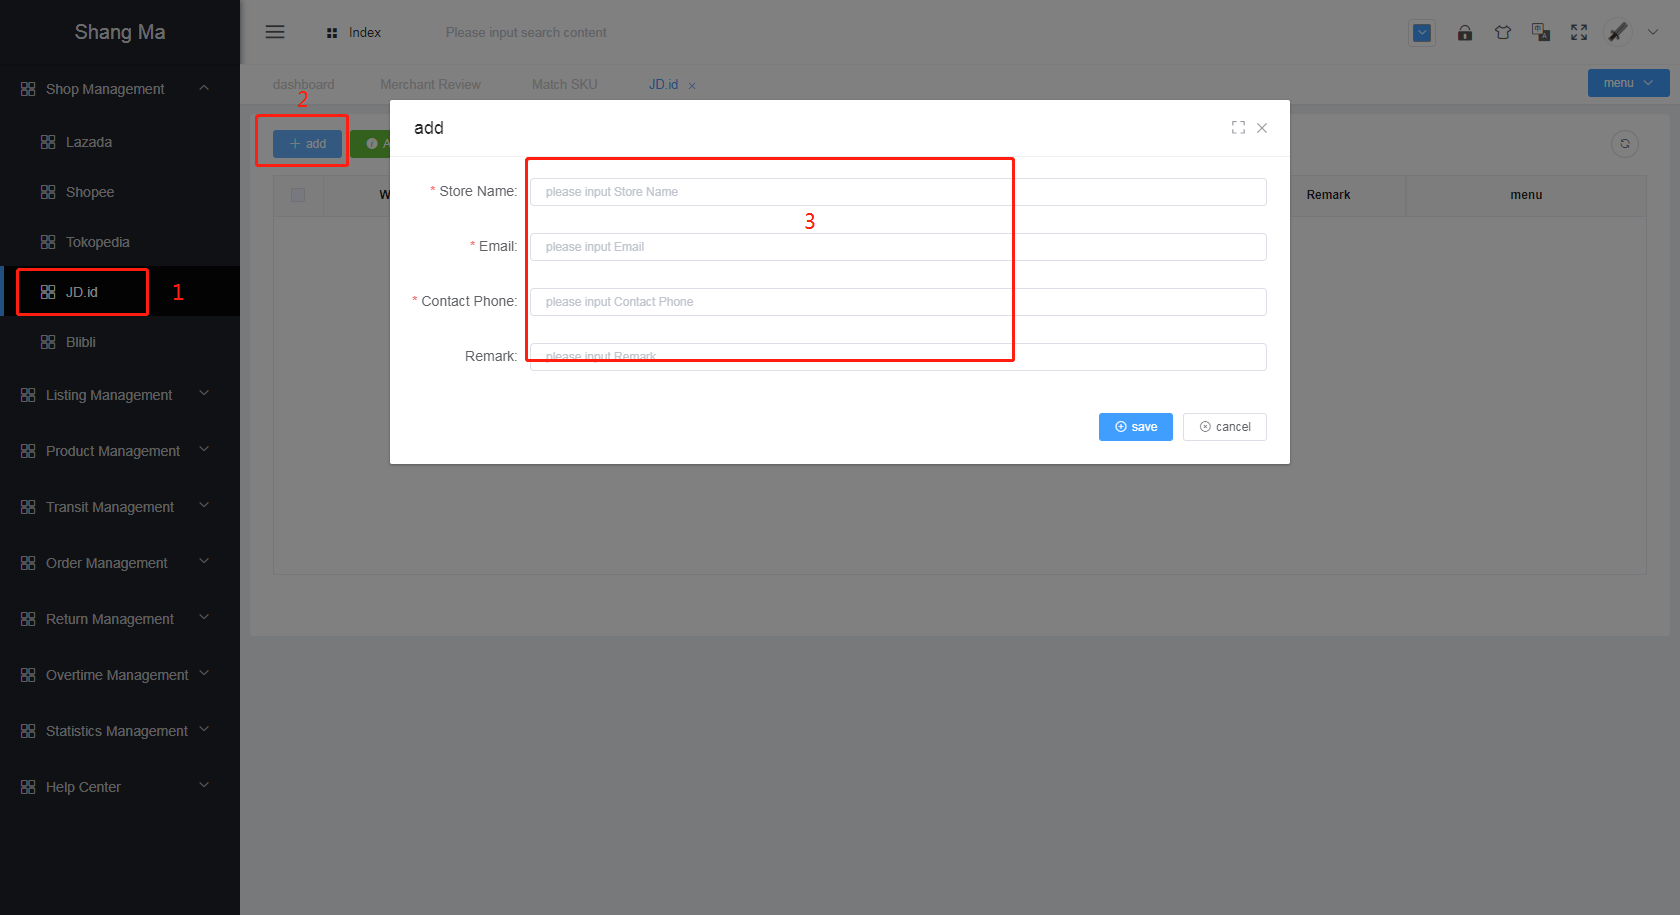
- Fill in sequentially: shop name, email address, after-sales phone number
# 4-2:Store authorization
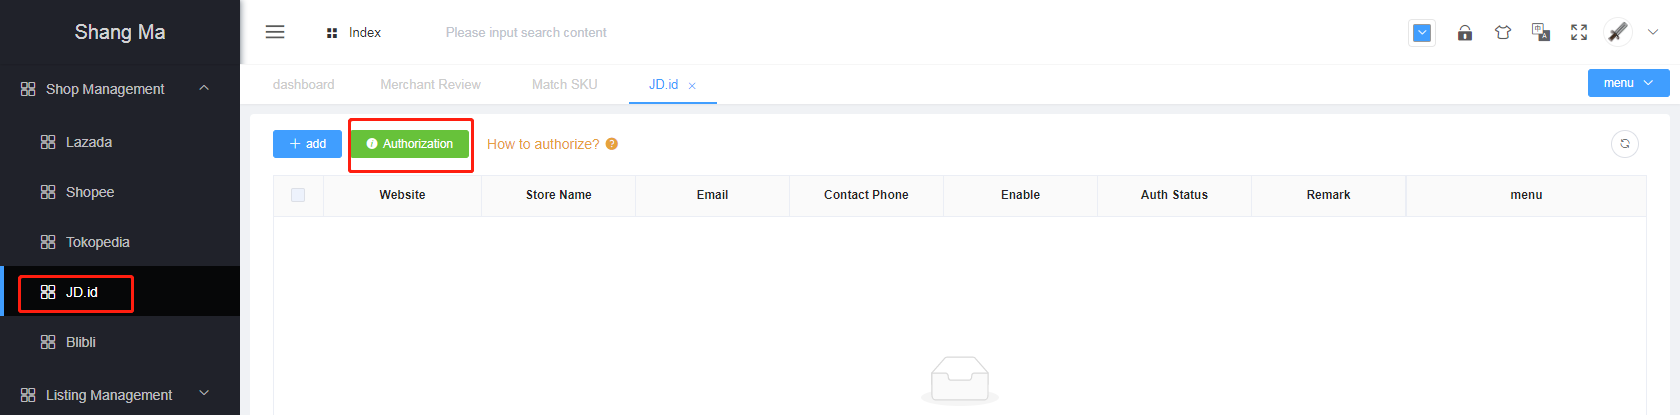
After clicking the
Authorization, the page will automatically jump to the official platform login authorization page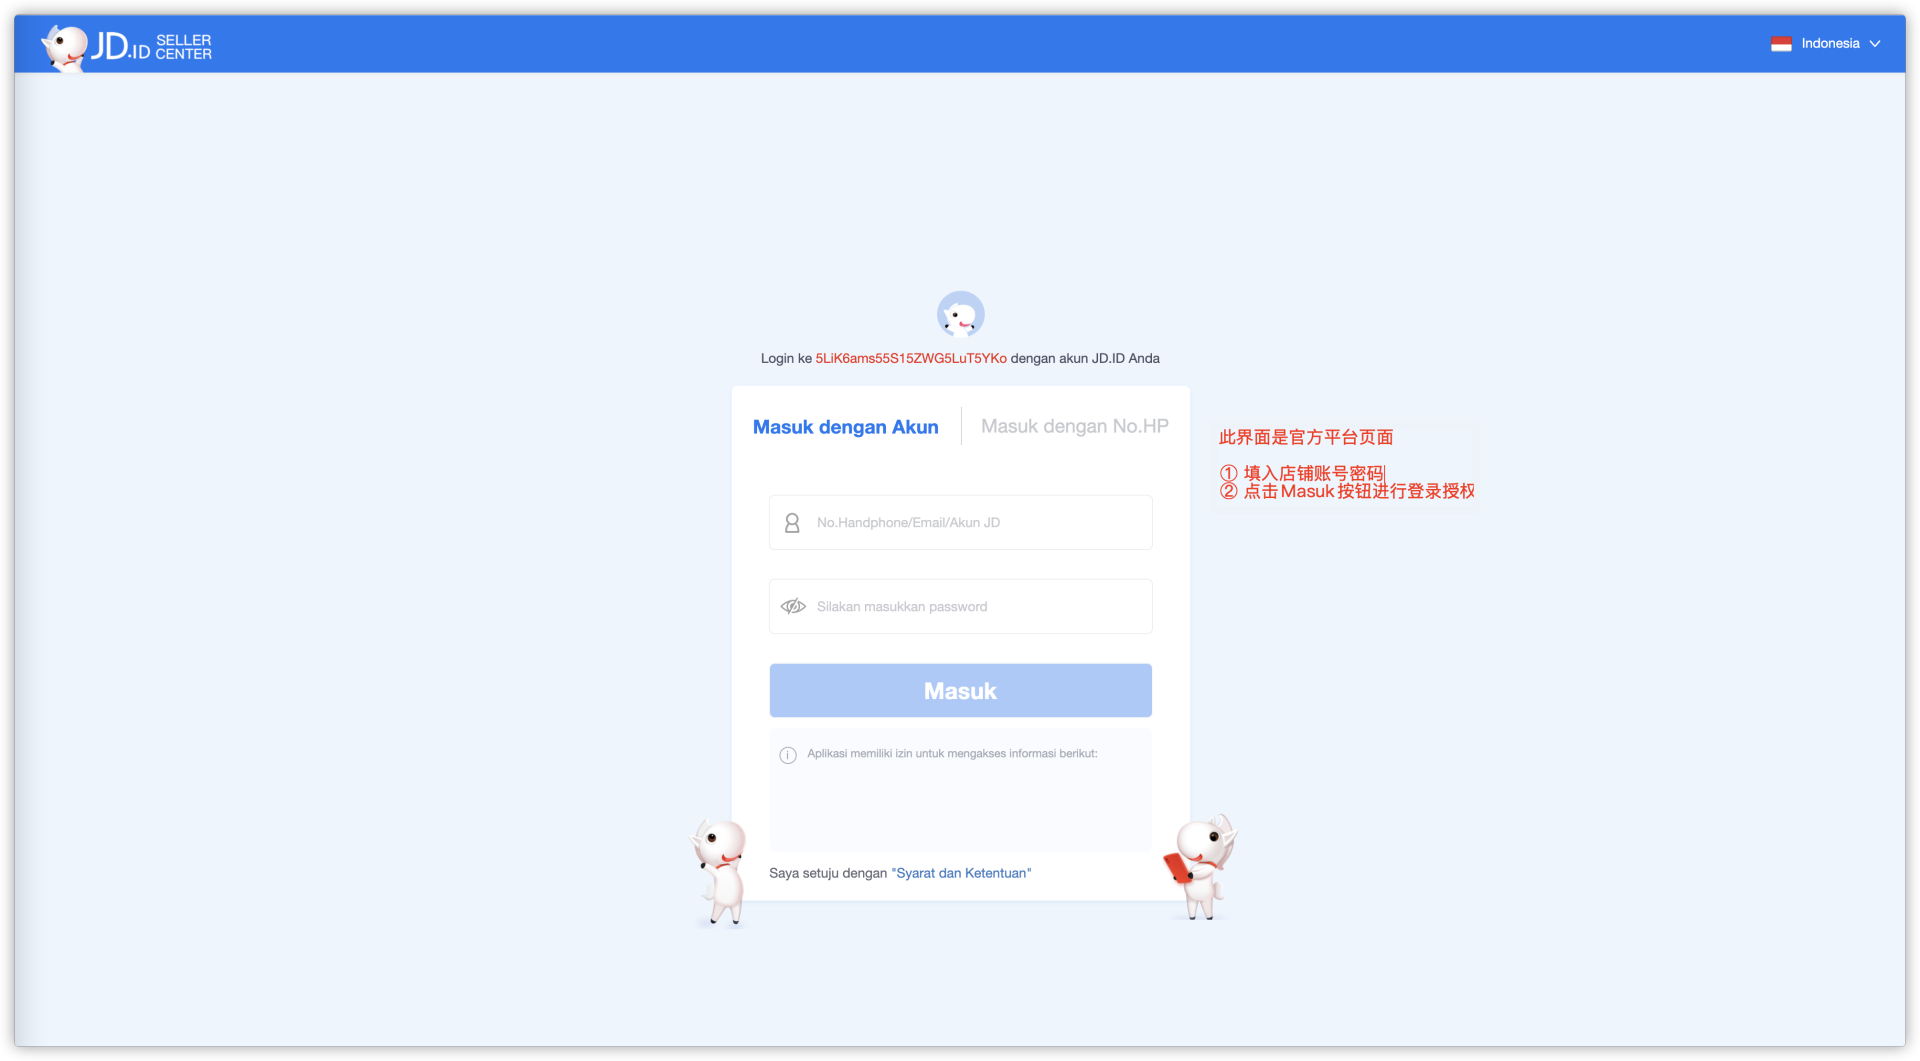
Enter the store account password, click the
Masukbutton to authorize, and the following will be displayed after success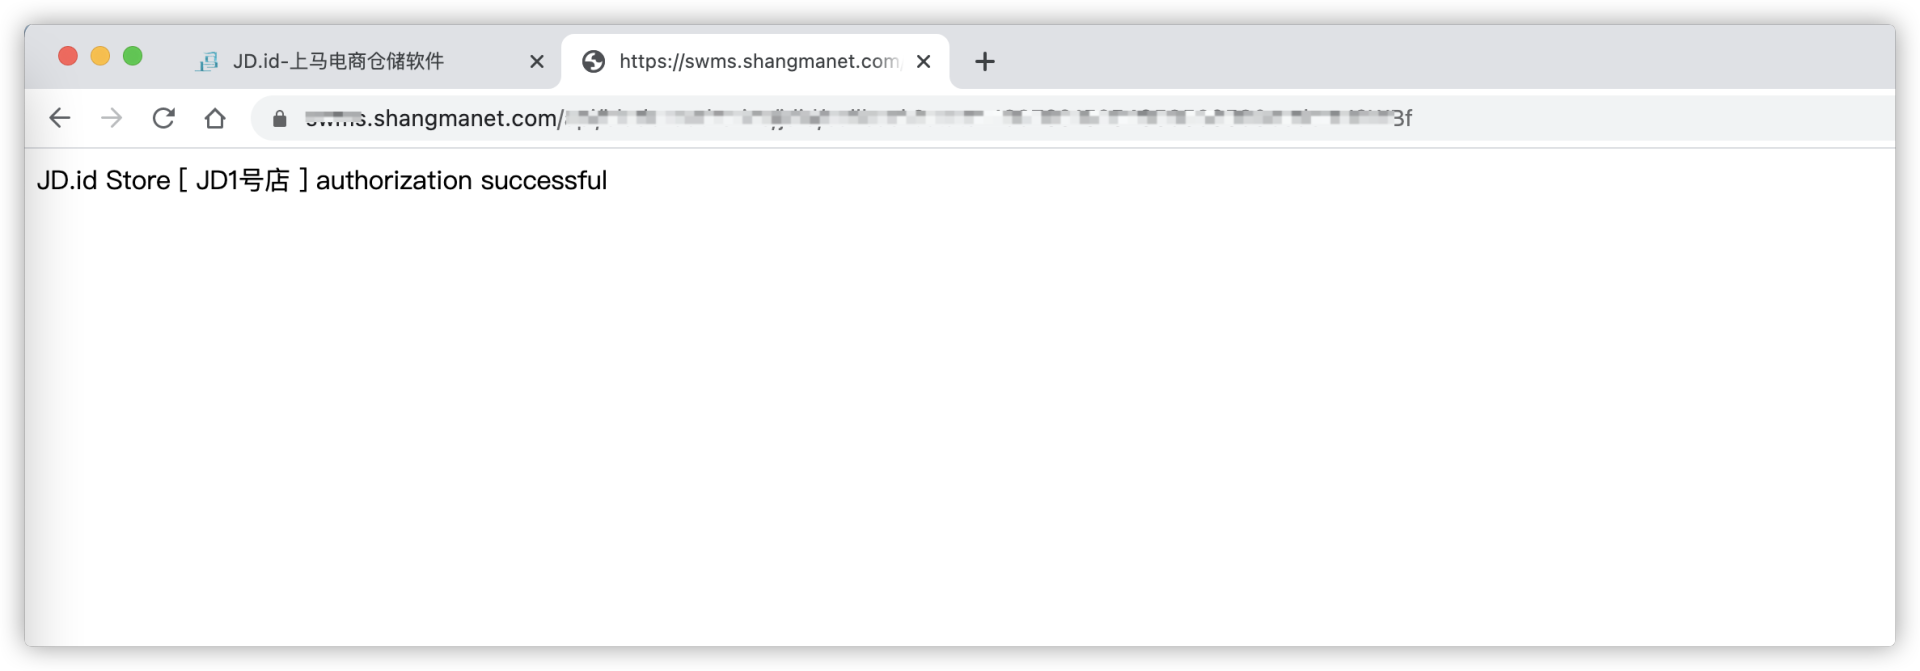
# 5.Authorized operation of Blibli
- To associate your Blibli Seller account with ShangMa, you need the following two pieces of information
- Seller ID
- Api-Seller-Key
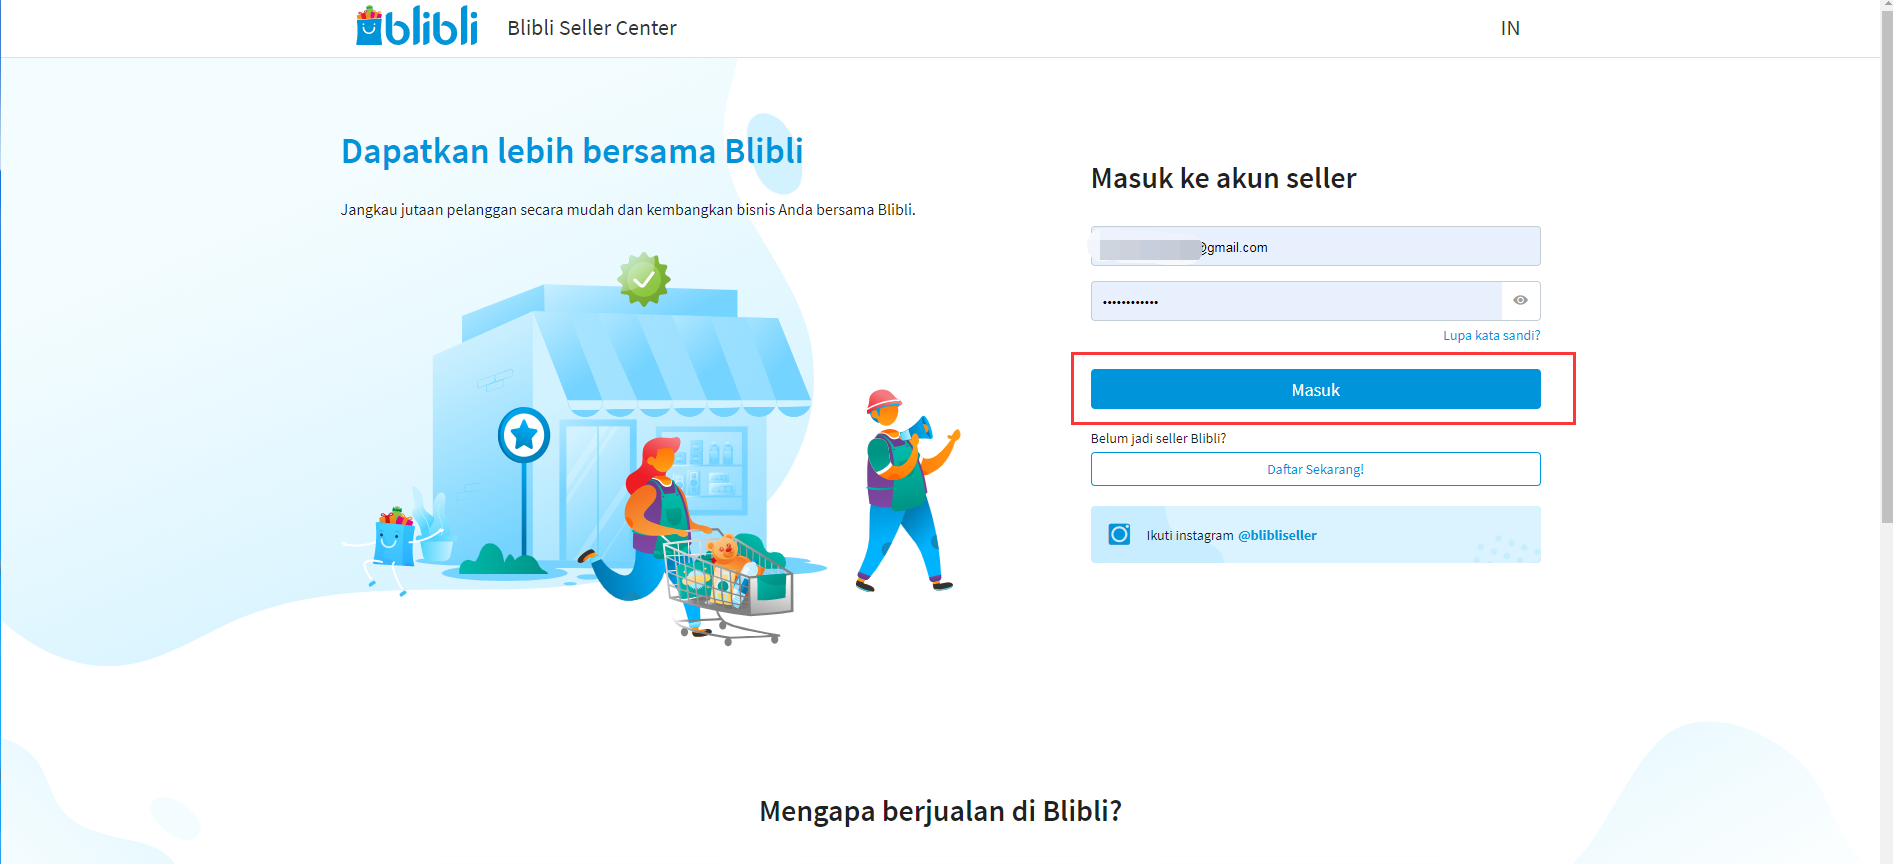
# 5-1: Log in to Blibli Seller Center
- Sign-in address: https://seller.blibli.com/sign-in
# 5-2: Copy Seller ID
- After successfully logging in, click on the user profile in the upper right corner of the page, and then drop down to select the Info toko option. You can find the ID Seller in the left part, as shown in the screenshot below:

# 5-3: Bind the API of ERP on horse and generate the store's API seller key
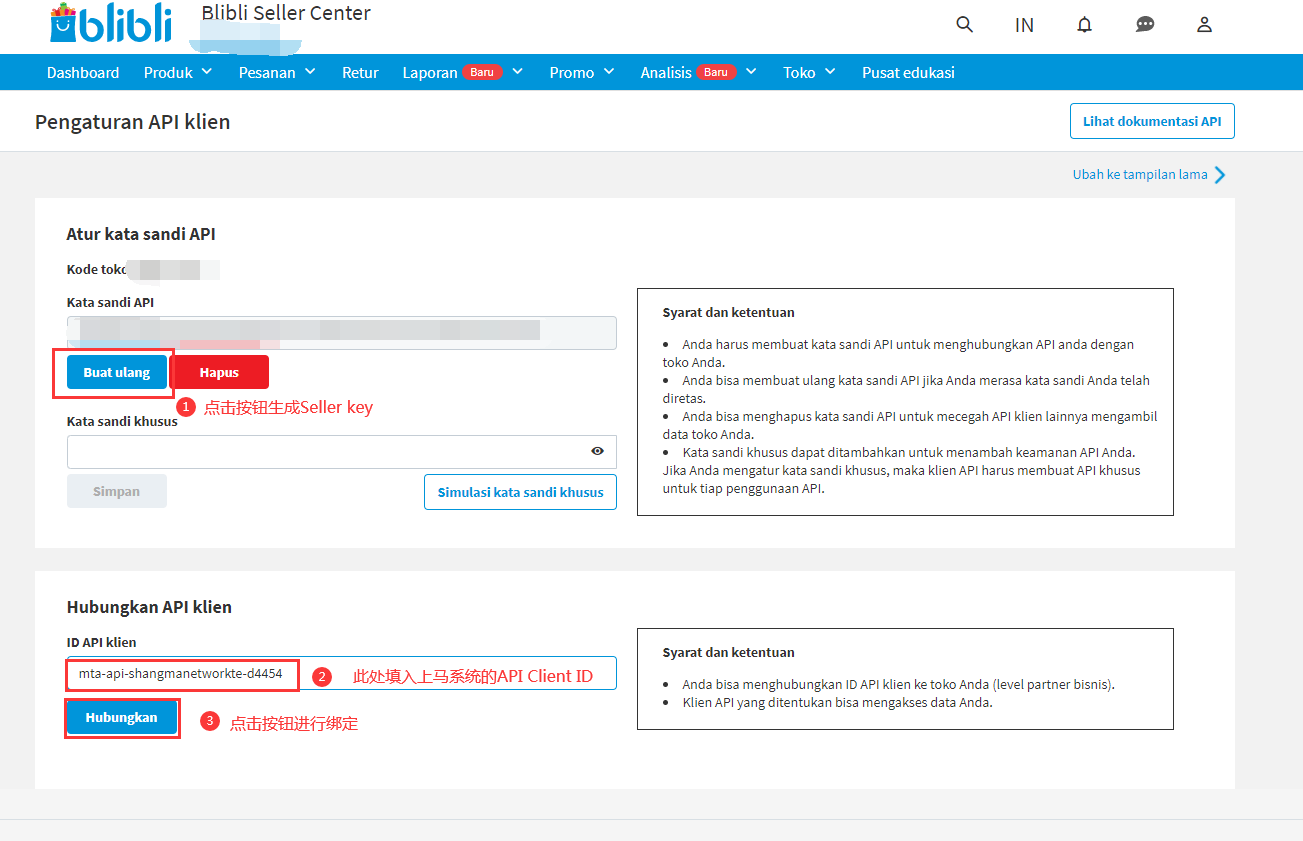
Click on the user profile in the upper right corner of the page, and then drop down to select the Pengaturan Seller API option. As shown in the screenshot below

If you have set up a Signature key, please turn it off before authorization, otherwise you will not be able to authorize to the ERP.
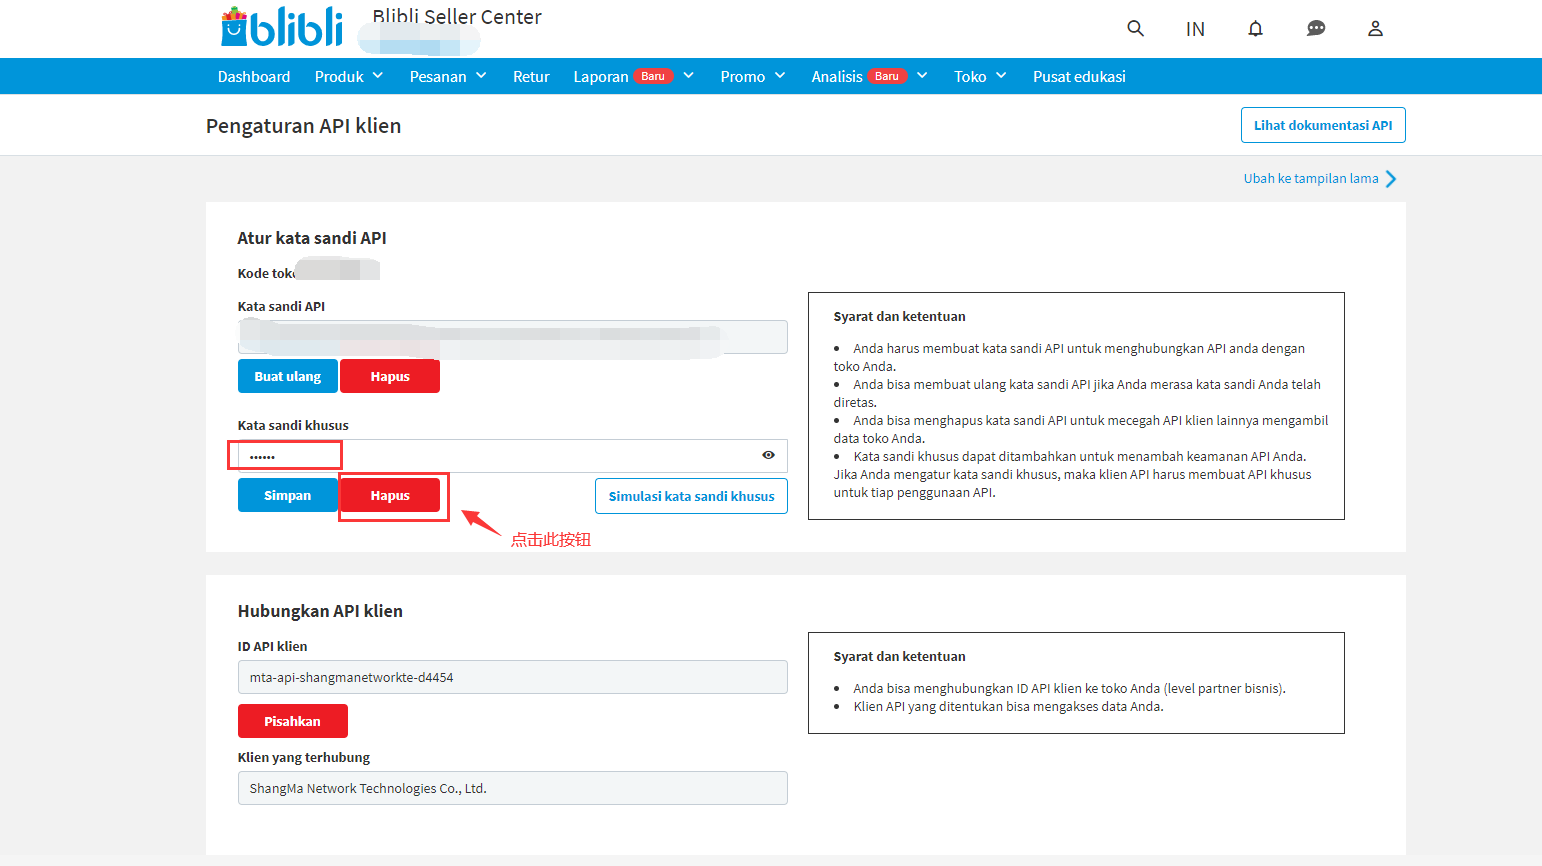
Click the Buat ulang button to generate Api-Seller-Key, and fill in the API Client ID of erp in ID API klien, as shown in the figure below: Shangma Client ID: mta-api-shangmanetworkte-d4454
# 5-4: New platform
- In the
Shop Management-Blibliinterface, clickAddEnter Blibli's corresponding login account email, and theSeller IDandApi-Seller-Keyobtained from the Blibli platform operation just now, and clickSave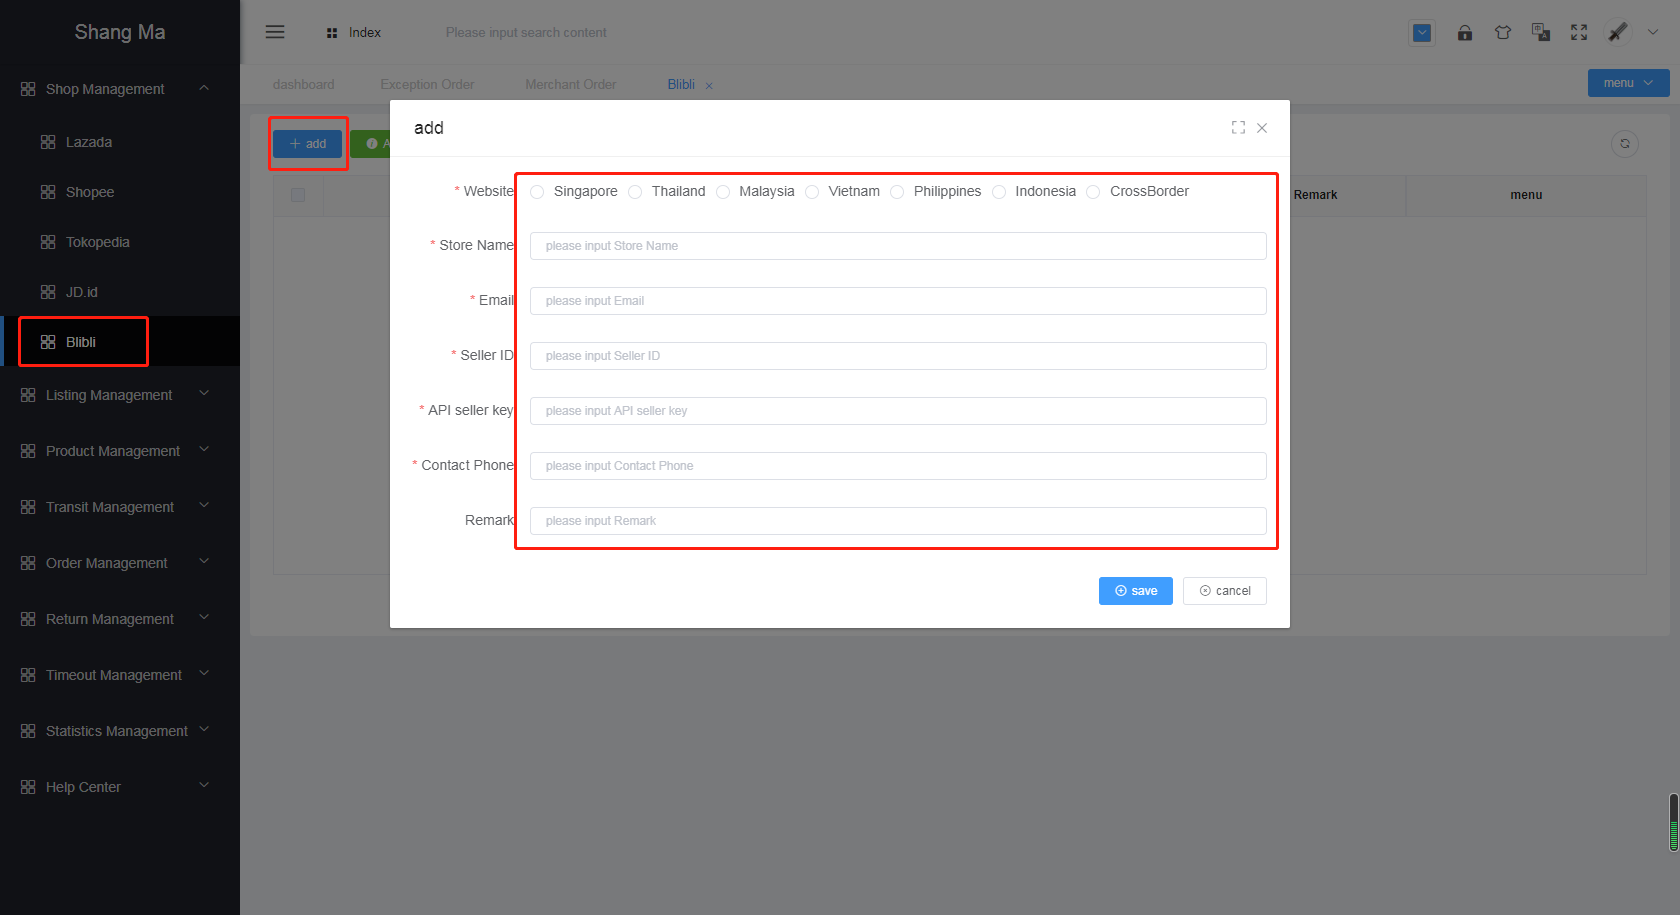
# 5-5: Platform authorization
- Check the added store and click
Authorization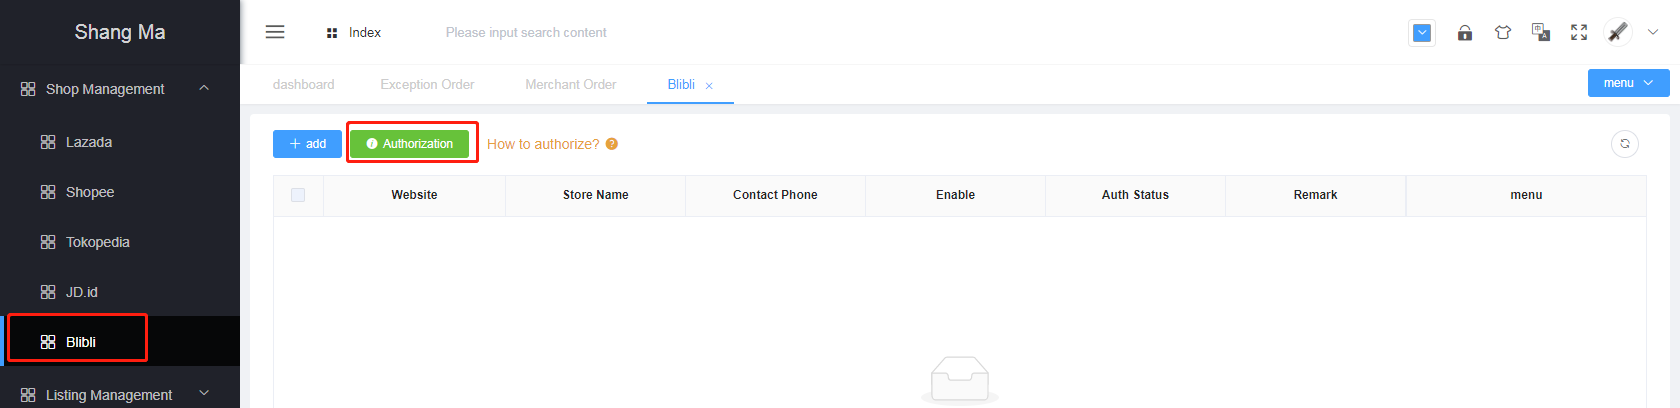
# 6.Authorized operation of Akulaku
# 6-1: In the first step, the merchant creates an Akulaku store
- Menu
Shop Management-Akulaku, fill in the information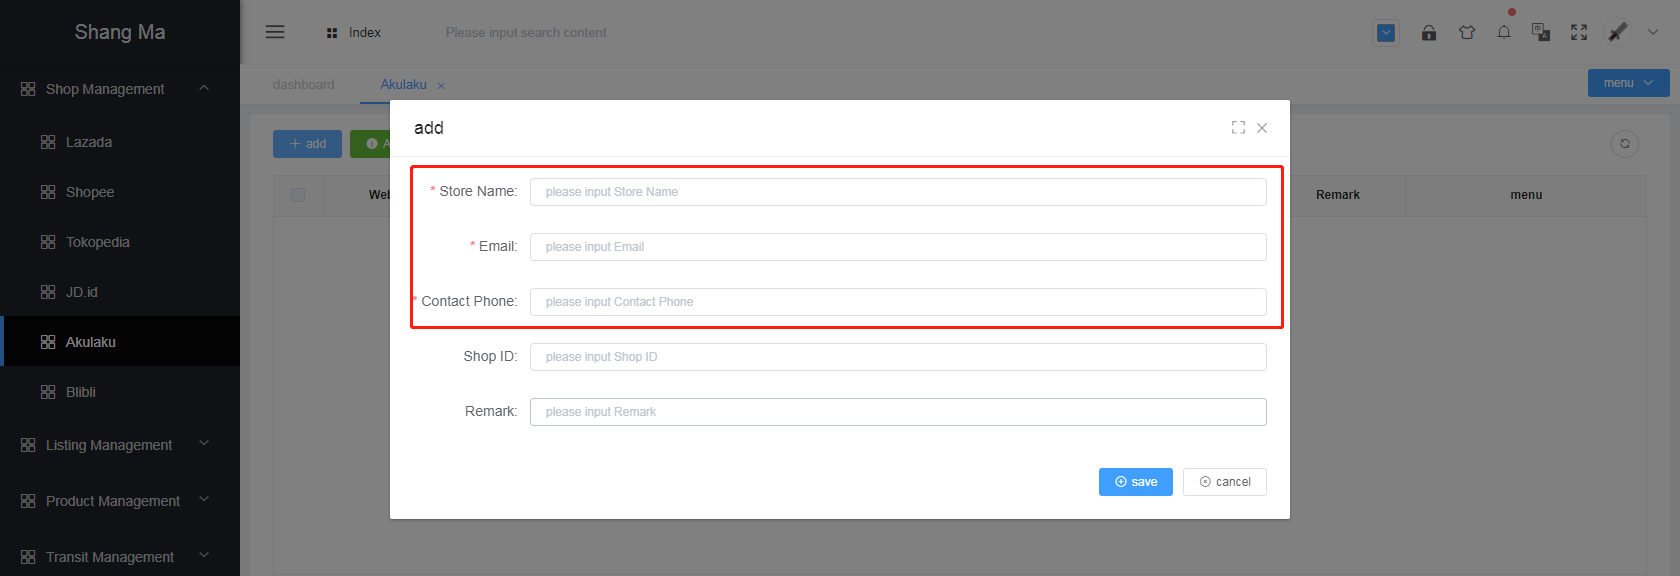
- Fill in sequentially: store name, email address, after-sales phone number, click
save
# 6-2: The second step, store authorization
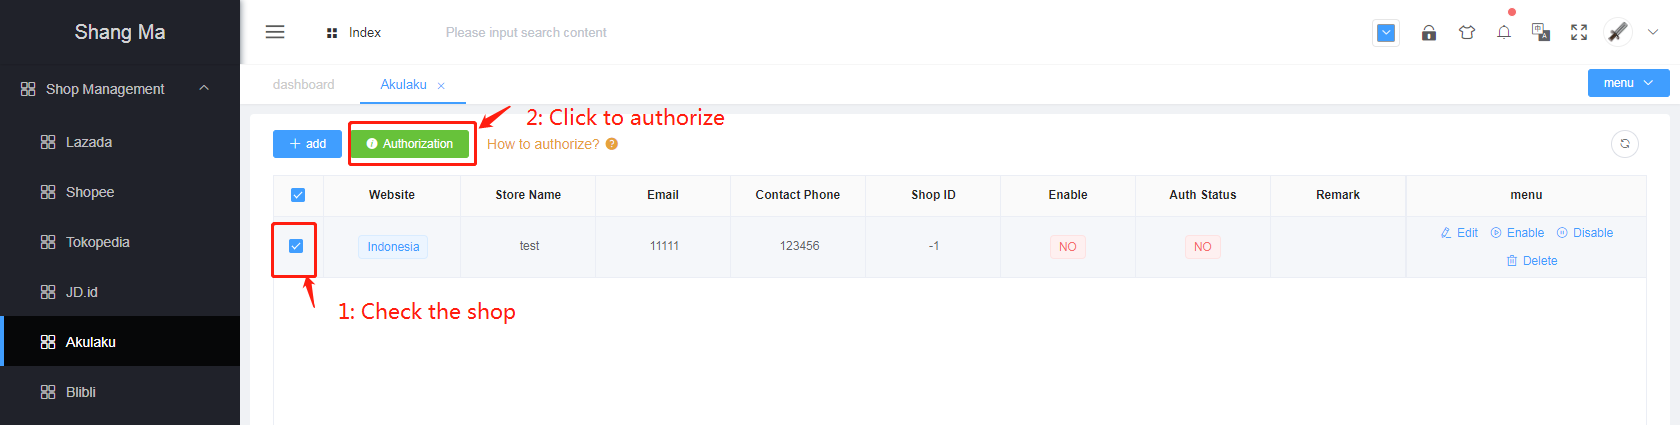
After clicking the
Authorization, the page will automatically jump to the official platform login authorization page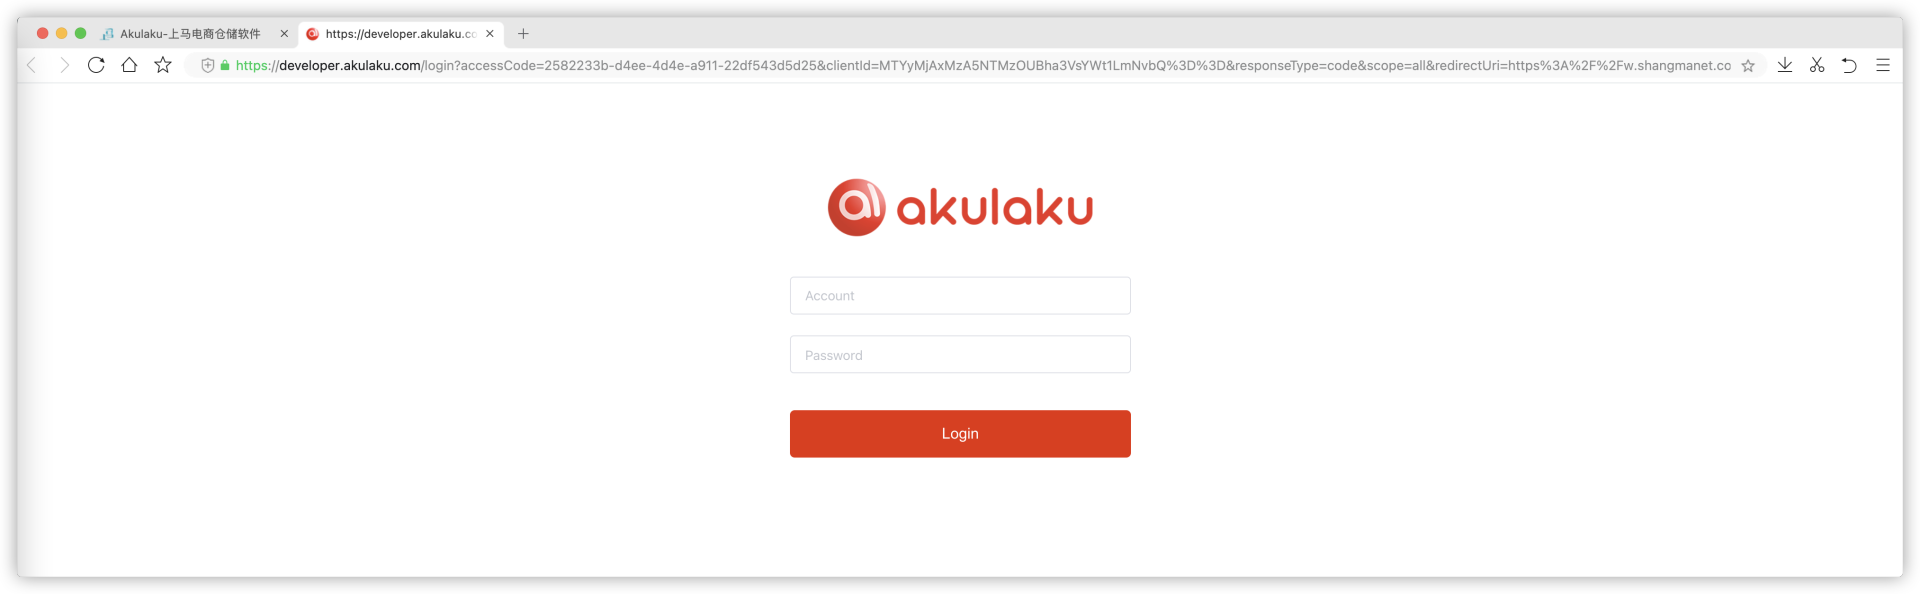
Fill in the store account password, click the Login button to authorize, and the following will be displayed after success

# 7、Authorized operation of Tiktok
# 7-1: The merchant creates a Tiktok store
Menu 【Shop Management】-【Tiktok】, fill in the information
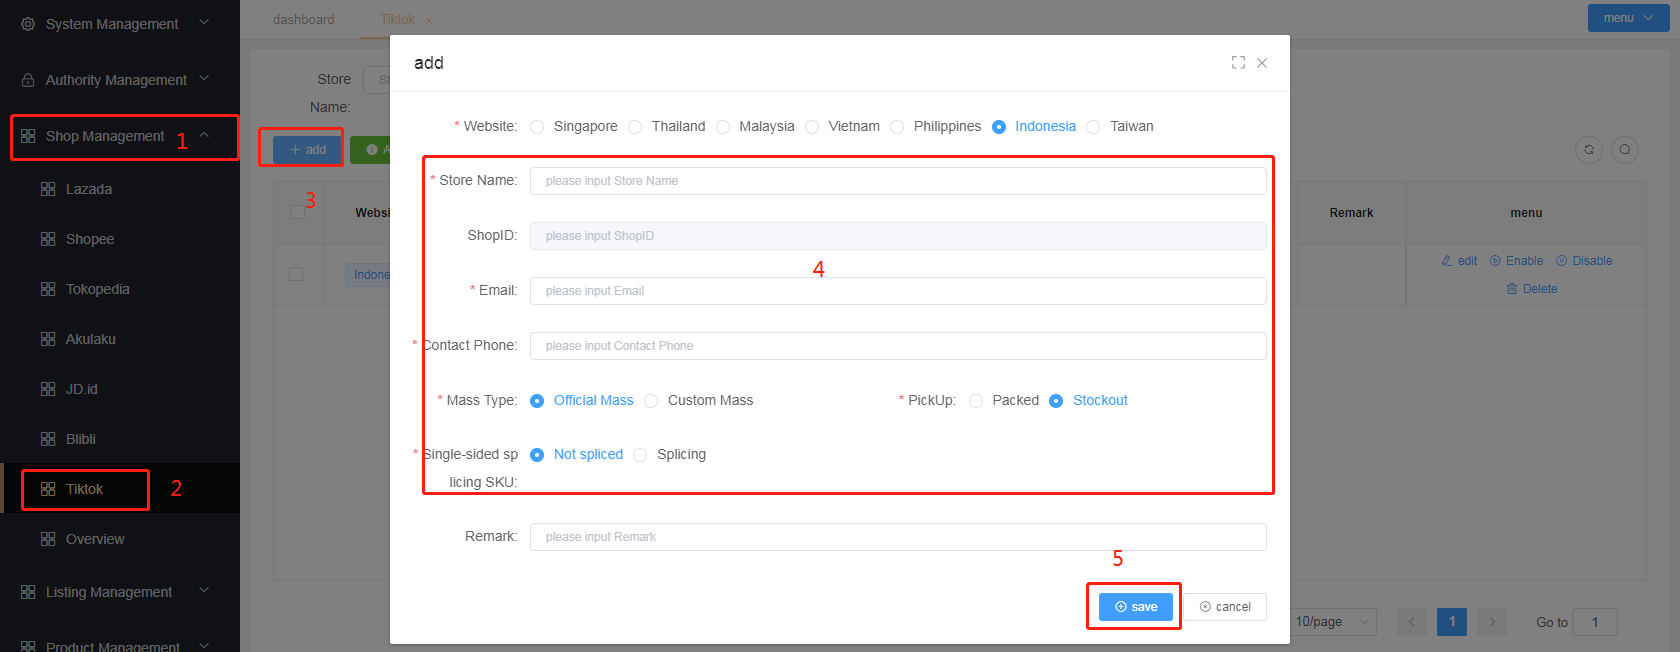
Fill in sequentially: shop name, email address, after-sales phone number
# 7-2: Store authorization
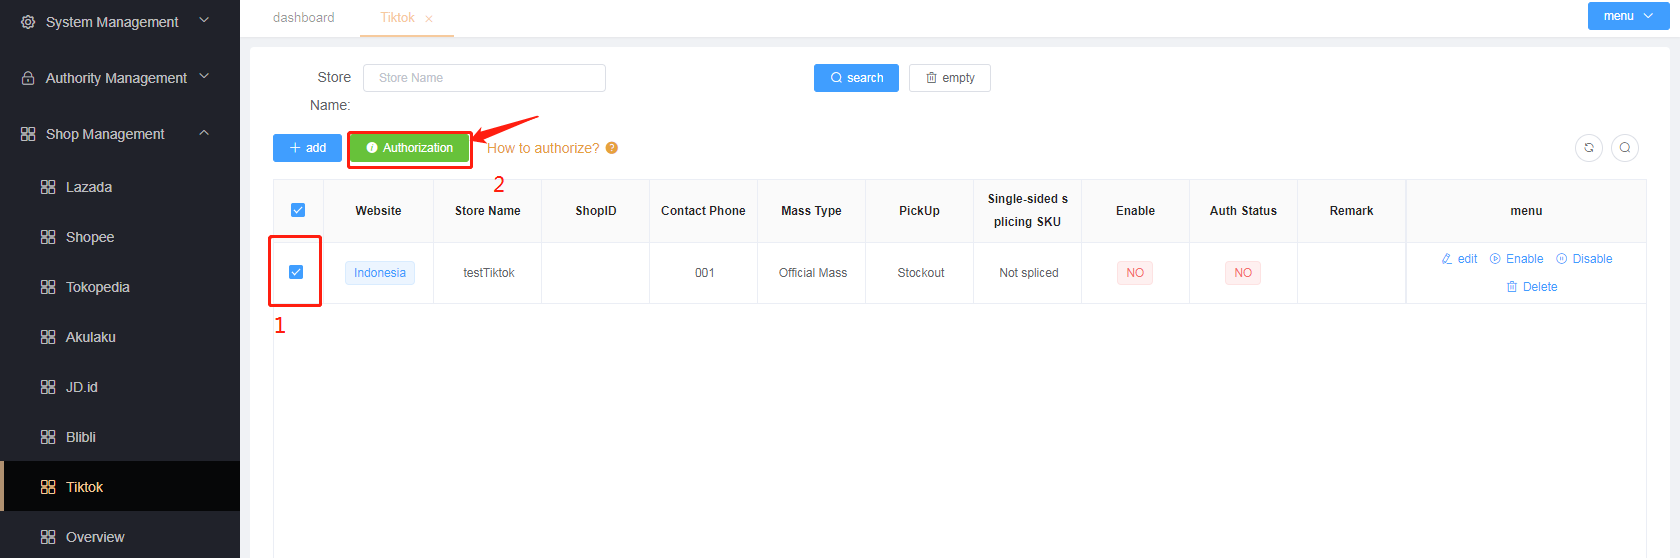
- fter clicking the authorization, the page will automatically jump to the official platform login authorization page
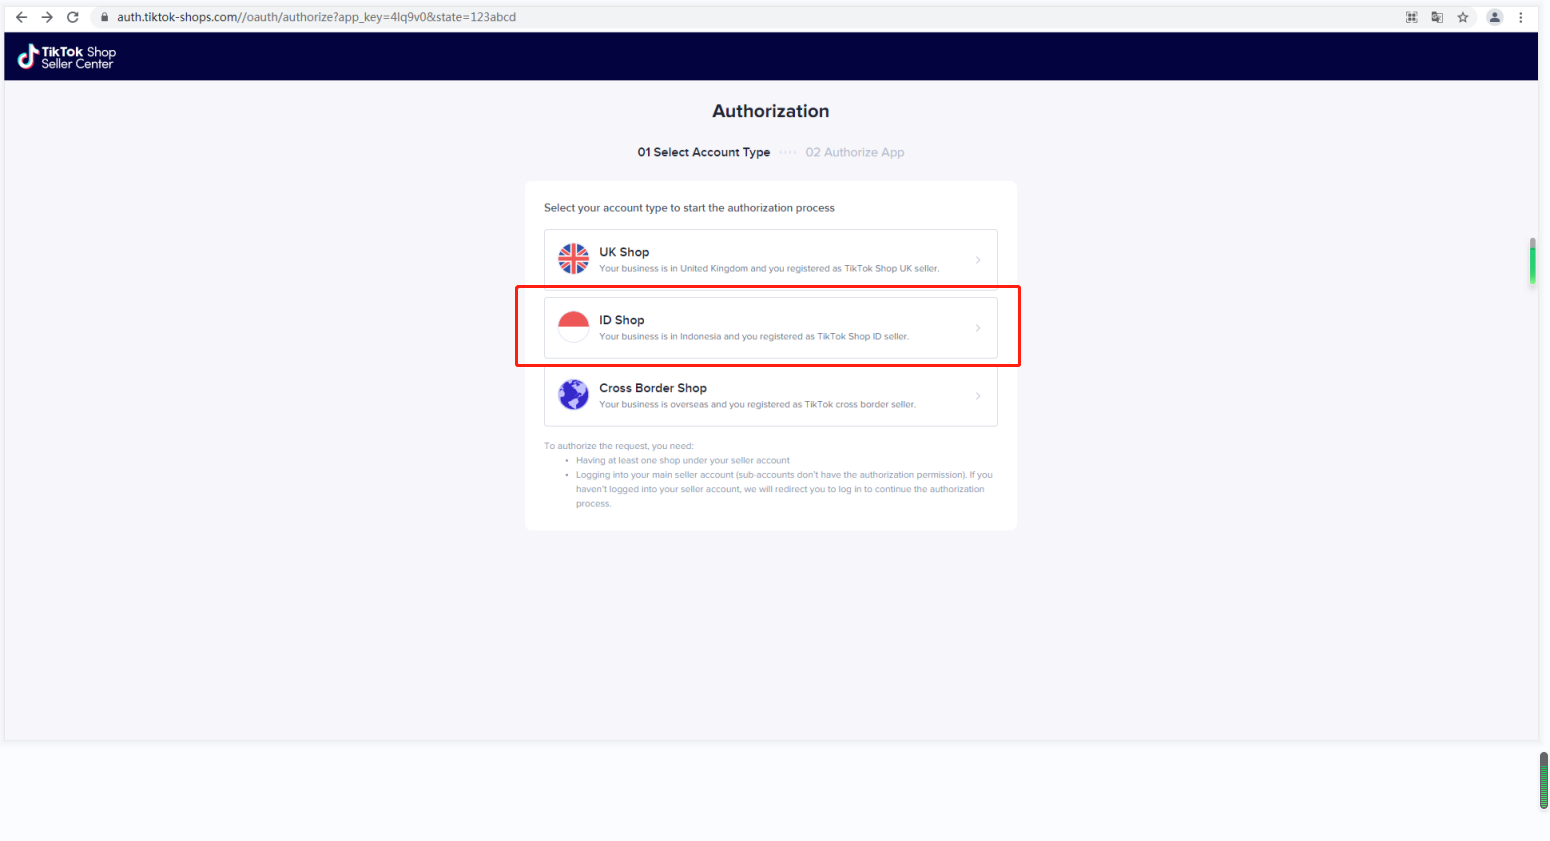
- ill in the store account password and click the login button to authorize

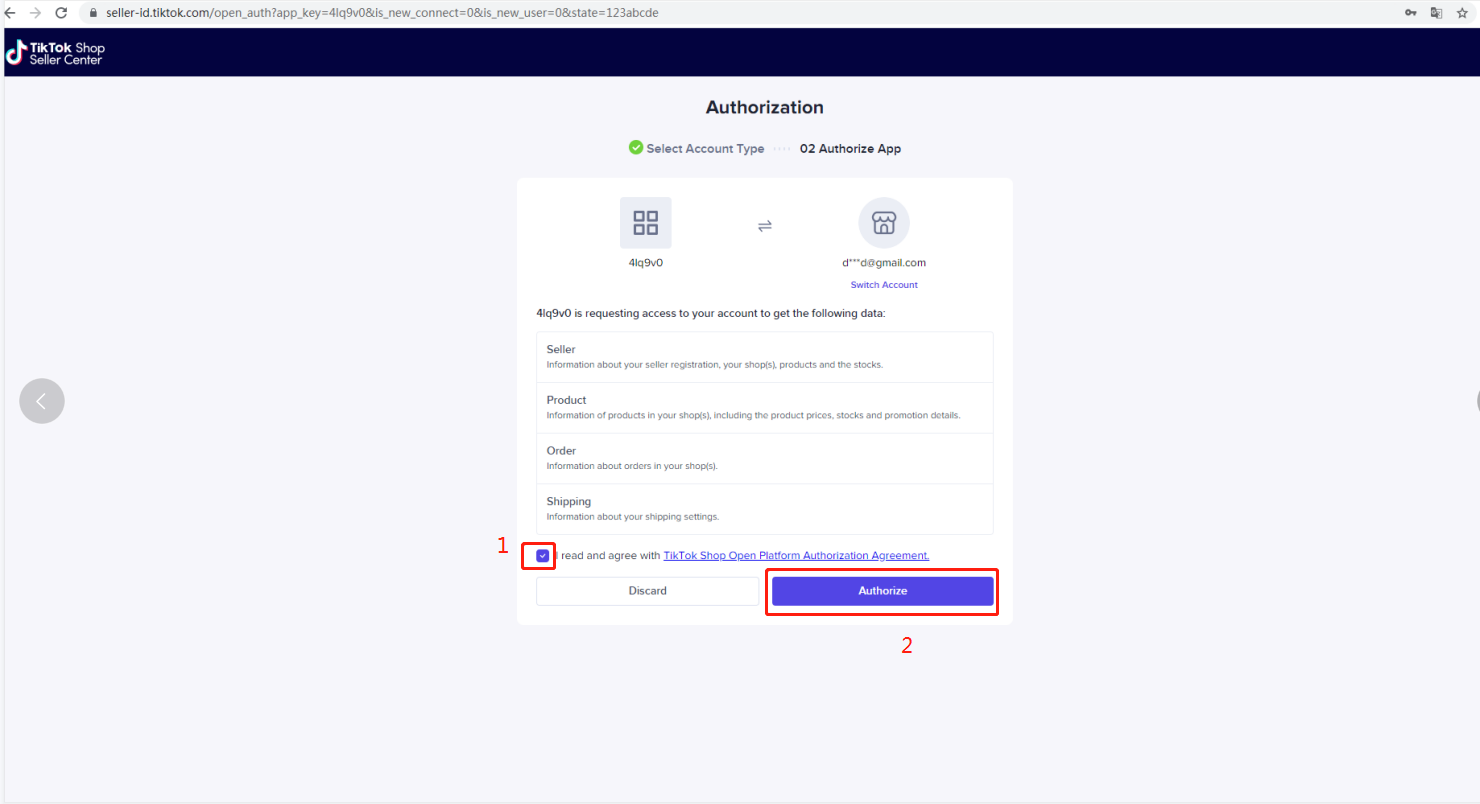
- After success, the display is as follows
# 8、 Authorized operation of Bukalapak
# 8-1: Create a Bukalapak store
Menu
Shop Management-Bukalapak, fill in the information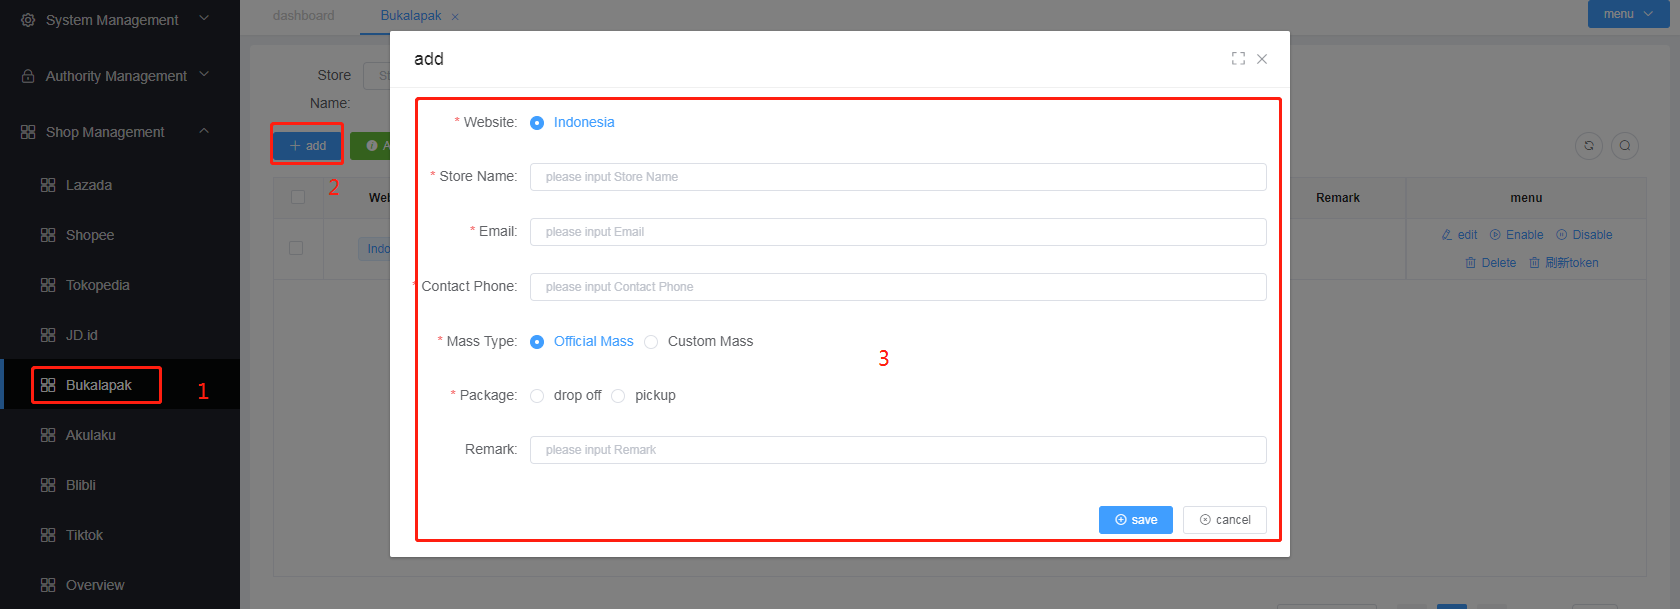
Fill in sequentially:
Store Name,Email,Contact Phone
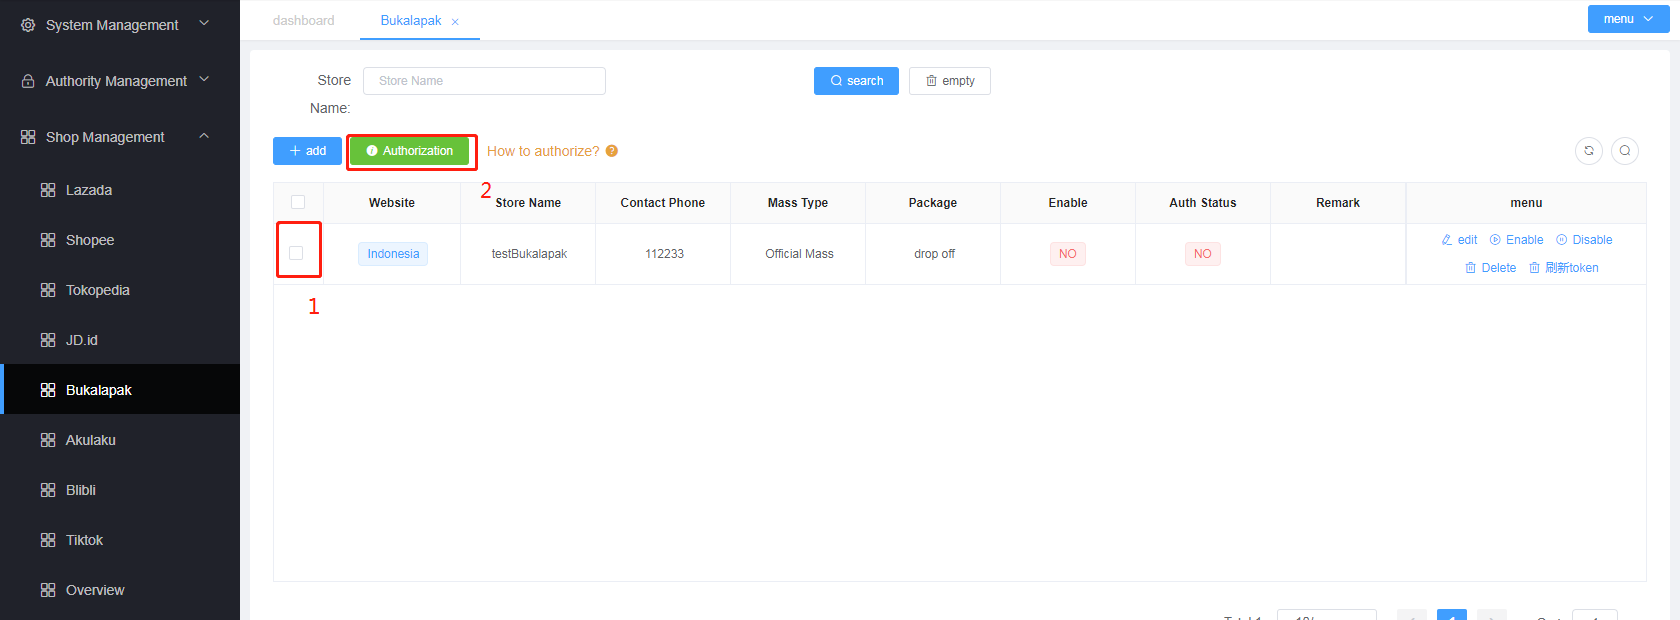
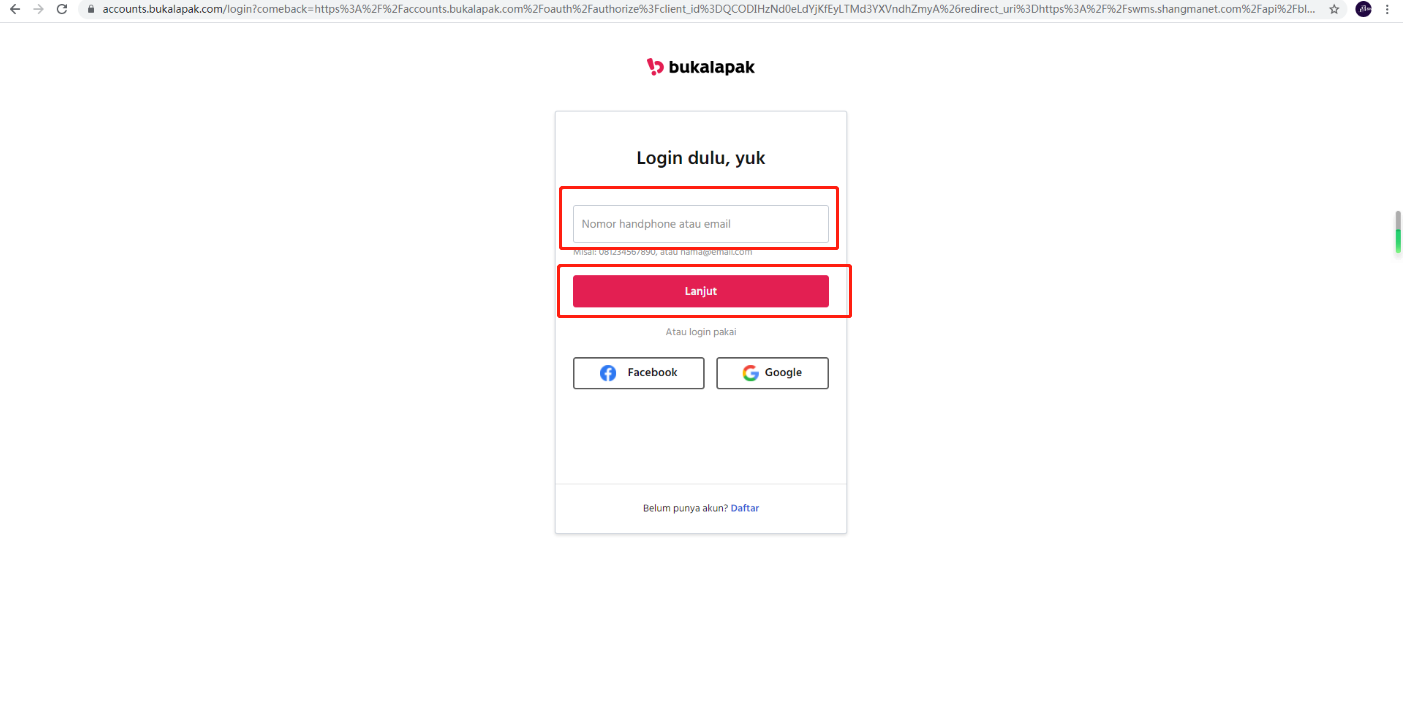
# 8-2: Store authorization
Check the shops that need to be authorized and click ````Authorization```
Fill in the store account number and click the login button to authorize
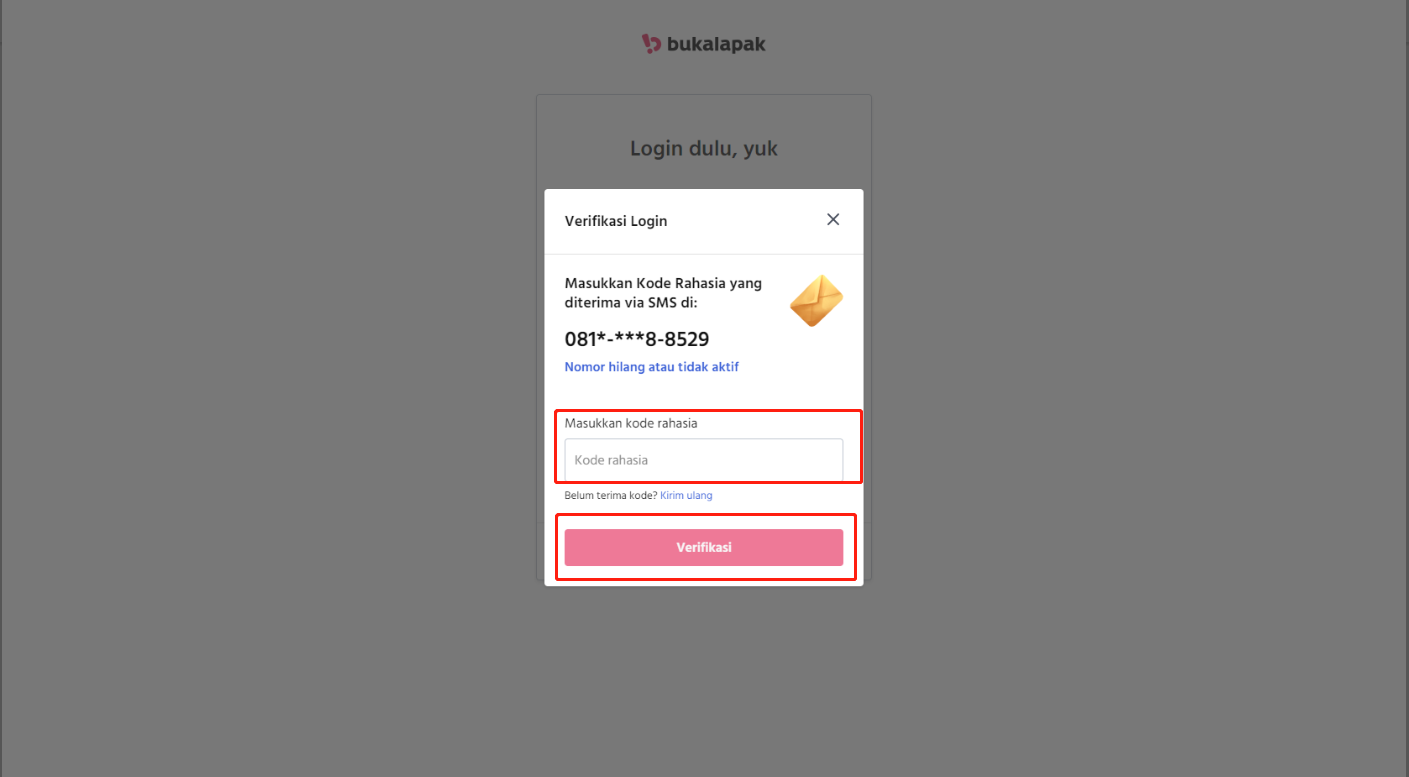
Fill in the received verification code
Confirm authorization
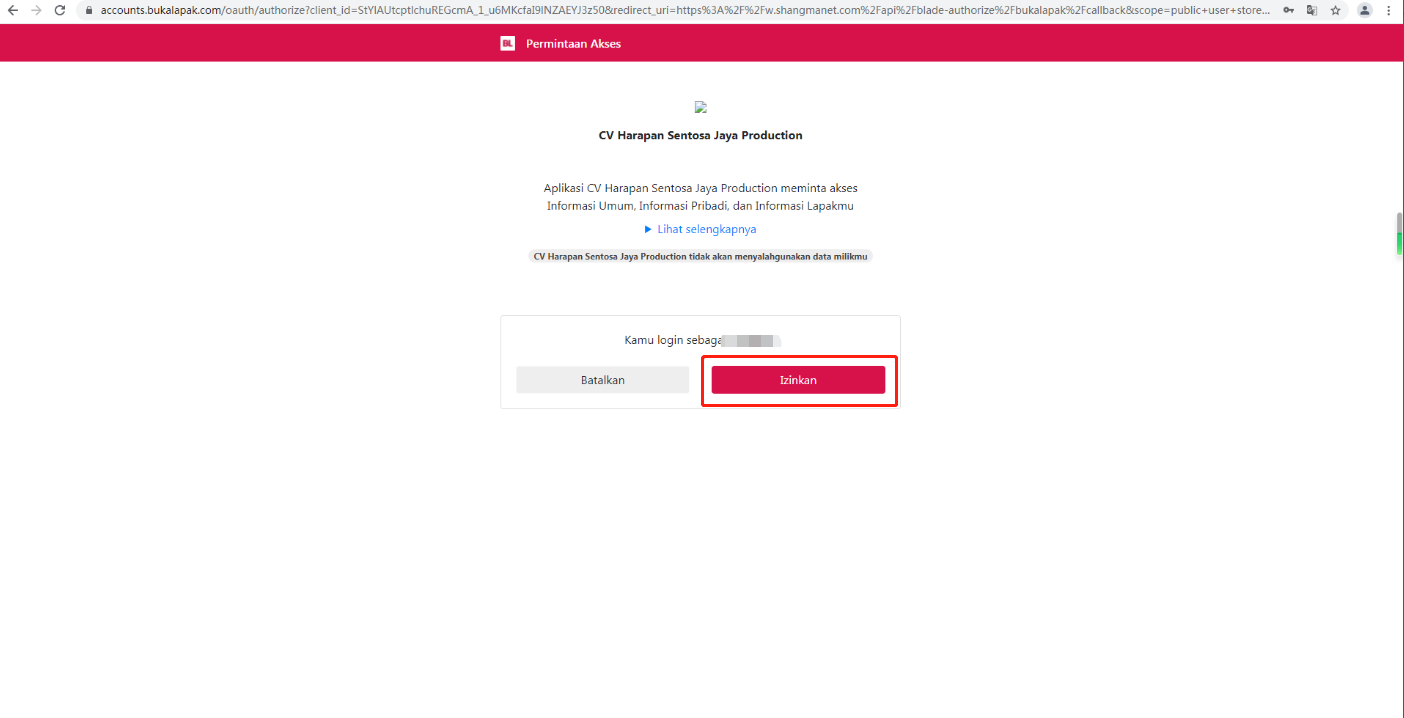
After success, the display is as follows
